
Category: Uncategorized

  • Under-Sink Protection: Preventing Hidden Water Leaks from Ruining Your Cabinets

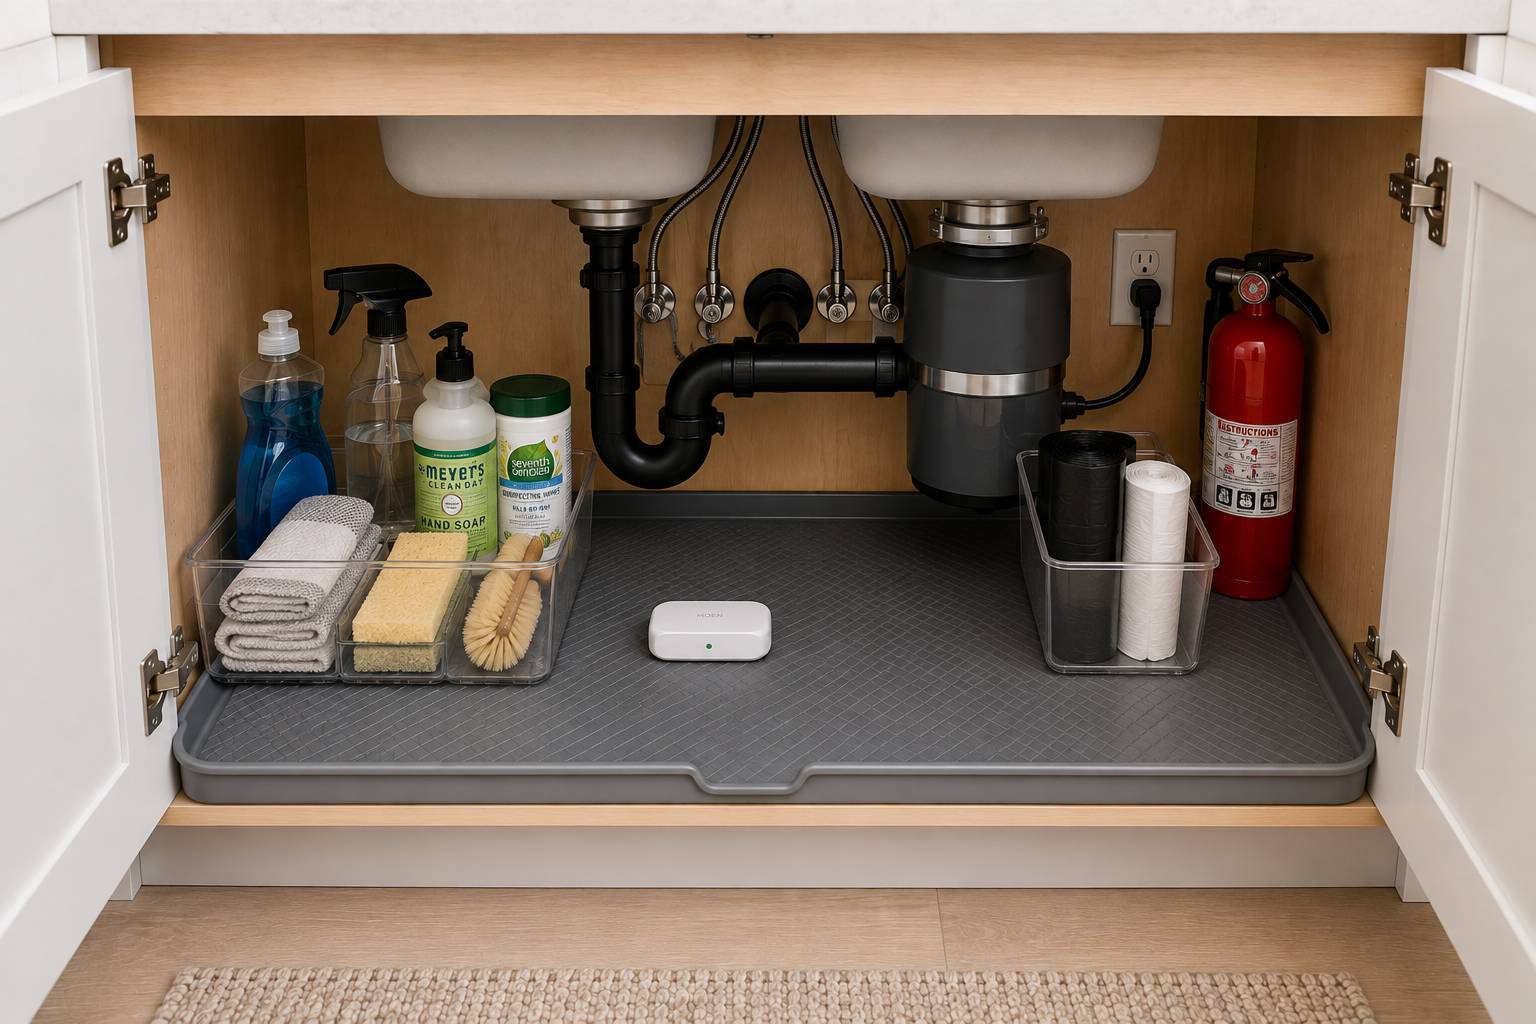
    The under-sink cabinet base is the hardest-working and most vulnerable square foot in any kitchen or bathroom. Homeowners across Oahu—from coastal properties in Kailua and Kaneohe to urban high-rises in Kakaʻako and family residences in Kapolei—rely on sink base cabinets to house complex plumbing, garbage disposals, water filtration units, and household cleaning supplies.

    Because under-sink cabinets are tucked behind closed doors, minor plumbing drips often go unnoticed for weeks or months. Slow leaks from loose supply lines, faulty drain P-traps, or condensation off cold water pipes silently pool at the bottom of the cabinet box.

    In Hawaii’s warm, humid climate, standing water inside a dark cabinet box leads to rapid wood rot, swollen cabinet floors, black mold growth, foul odors, and attracted pest activity.

    Protecting your investment starts with choosing structural materials engineered to handle moisture. Sourcing 100% all-plywood kitchen cabinets, paired with pre-polished quartz countertops, undermount sinks, and waterproof LVP flooring directly from our Aiea warehouse, provides your home with a resilient foundation built to withstand hidden leaks.

    Technical Performance Matrix: Sink Base Materials Under Leak Conditions

    Before selecting kitchen or vanity cabinets for your remodel, evaluate how different cabinet box materials react when exposed to hidden under-sink water leaks:

    Evaluation Criteria Builder-Grade Particleboard / MDF Standard Furniture-Grade Plywood All-Plywood Construction (Maikaʻi Import Standard)
    Moisture Resistance Poor; absorbs water instantly and swells permanently Moderate; resists minor spills if wiped up immediately Superior; cross-laminated layers bound with waterproof adhesives
    Structural Integrity After Leak Low; crumbles, sags, and loses screw-holding power Moderate; may show minor surface grain raise High; retains structural strength and load-bearing capacity
    Delamination & Peeling Risk High; thin vinyl or paper foil face peels off easily Low; real wood veneer bonded directly to plywood core Zero paper peeling; solid wood veneer faces withstand moisture
    Mold & Termite Resistance Very Low; wet composite board attracts termites and mold Moderate; requires proper drying after a leak High; dense hardwood layers resist Formosan termite penetration

    4 Essential Layers of Under-Sink Protection

    Preventing a slow plumbing drip from turning into a costly kitchen teardown requires combining smart cabinet construction with proactive protective measures.

    1. Upgrade to 100% All-Plywood Cabinet Boxes

    The most critical line of defense against water damage is the core material of the cabinet box itself. Many big-box retail cabinets utilize compressed particleboard or medium-density fiberboard (MDF) for sink base floors. When exposed to water, particleboard acts like a sponge—swelling to twice its original thickness, flaking apart, and sagging under the weight of garbage disposals.

    Our cabinetry collections feature 100% all-plywood box construction with solid wood face frames. Cross-laminated hardwood plywood layers are bound together using waterproof adhesives. If a plumbing leak occurs, all-plywood boxes resist swelling, holding their structural shape while allowing you time to repair the plumbing fixture.

    2. Seal Cabinet Interior Seams with Silicone

    When water pools on an unsealed cabinet floor, it eventually seeps down through the small gaps where the cabinet floor meets the side and back walls. Once water trickles past the cabinet floor, it damages the subfloor, rots wood joists, or leaks down into lower condo units.

    During cabinet installation, apply a continuous bead of 100% waterproof clear silicone along all internal bottom seams of the sink base cabinet. Sealing these interior joints turns the cabinet floor into a temporary water-tight containment basin.

    3. Install a Custom Waterproof Mat or Drip Tray

    To protect the wood finish of your new sink base cabinet from leaky detergent bottles and minor pipe drips, place a flexible, waterproof silicone sink mat or molded plastic drip tray on the cabinet floor. High-lipped silicone mats can trap up to a gallon of standing water, preventing liquids from ever touching the plywood cabinet floor.

    4. Add a Smart Wi-Fi Water Leak Sensor

    Incorporate a low-cost, battery-operated Wi-Fi water leak sensor on the cabinet floor directly beneath the sink P-trap and shut-off valves. If a leak occurs, the sensor sounds an audible alarm and sends an immediate alert to your smartphone, allowing you to shut off the water valve before damage spreads.

    Material Specifications: Built for Heavy Plumbing Load Support

    Under-sink base cabinets must support significant physical weight in addition to handling moisture exposure. A heavy double-bowl sink filled with water, a cast-iron garbage disposal, heavy brass shut-off valves, and a 3cm engineered quartz countertop place immense stress on the cabinet frame.

    Component Zone Technical Specification Island Homeowner Benefit
    Sink Base Box 100% All-Plywood Framing Supports heavy quartz decks and disposals without bowing
    Countertop Deck Pre-Polished Engineered Quartz Non-porous stone barrier preventing top-down water intrusion
    Sink Basin Undermount 16-Gauge Stainless Steel Watertight rim seal mounted with mechanical epoxy clips
    Hardware Components European Soft-Close Hinges Nickel-plated concealed hinges resist rust in humid cabinets

    Pairing solid all-plywood sink cabinets with our pre-polished quartz countertops and undermount stainless steel sinks creates a watertight upper seal. You can extend this moisture protection throughout your home with 100% waterproof rigid core LVP flooring and grout-free shower panels.

    Under-Sink Protection FAQs

    What should I do immediately if I discover standing water in my sink cabinet?

    First, turn off the hot and cold water shut-off valves under the sink to stop active leaks. Wipe up standing water using dry towels, and remove all items from the cabinet. Position a portable fan or dehumidifier pointing directly into the open cabinet box for 24 to 48 hours to thoroughly dry the plywood layers.

    Can an all-plywood sink base cabinet be saved after a major plumbing leak?

    Yes. Unlike particleboard cabinets that swell permanently and must be torn out after a soaking, solid all-plywood cabinet boxes dry out without losing their structural integrity. Once completely dry, the plywood can be sanitized, sanded, and refinished if needed.

    Why are undermount sinks better at preventing under-sink leaks than drop-in sinks?

    Drop-in sinks rely on a top perimeter caulk seam that degrades under tropical sunlight and cleaning chemicals, allowing counter water to seep down behind the sink into the cabinet below. Undermount sinks are sealed to the underside of non-porous quartz slabs using mechanical clips and continuous epoxy/silicone bonds, creating a permanently watertight top barrier.

    Are soft-close cabinet hinges affected by under-sink humidity?

    High humidity inside closed sink cabinets can cause cheap metal hinges to rust and stick. Our modular cabinets utilize European nickel-plated soft-close hinges designed to resist salt-air corrosion and operate smoothly in humid island environments.

    Can I inspect all-plywood sink base cabinets in person before buying?

    Yes. Visiting our Aiea showroom allows you to inspect our 100% all-plywood box construction, test soft-close drawer slides, view undermount stainless steel sinks, and consult with our product specialists regarding your kitchen or bath layout. View our whole-home gallery to see completed installations across Oahu.

    Protect Your Kitchen Investment Today

    Ready to upgrade your home with durable, all-plywood cabinetry engineered to handle Hawaii’s climate? Visit the product specialists at Maikaʻi Import to check real-time stock levels, view physical samples, and receive a detailed project estimate:

    • Visit Our Regional Showroom: Inspect cabinet box construction, examine full-size quartz slabs, test sink plumbing configurations, and view flooring samples at 98-019 Kamehameha Hwy #8, Aiea, HI 96701, inside the Harbor Center business complex.
    • Request an Estimate: Call our front sales desk at (808) 488-5678 during regular operating hours (Monday through Saturday, 8:00 AM to 5:00 PM) to confirm product availability and schedule material pickup.
    Get a Quote

  • Low-Maintenance Bathrooms: How to Eliminate Tile Grout Scrubbing for Good

    Keeping a bathroom clean on Oahu can feel like a constant battle against moisture and humidity. Across humid coastal areas like Kaneohe, Kailua, and Ewa Beach, standard tiled showers and traditional grout lines attract black mold, mildew, soap scum, and hard water stains.

    For decades, ceramic tile was the default choice for bathroom walls and floors. However, the true culprit behind endless bathroom scrubbing isn’t the tile itself—it’s the porous cement grout between the tiles. Cement grout absorbs water, body oils, and minerals, creating an ideal environment for mold and mildew growth.

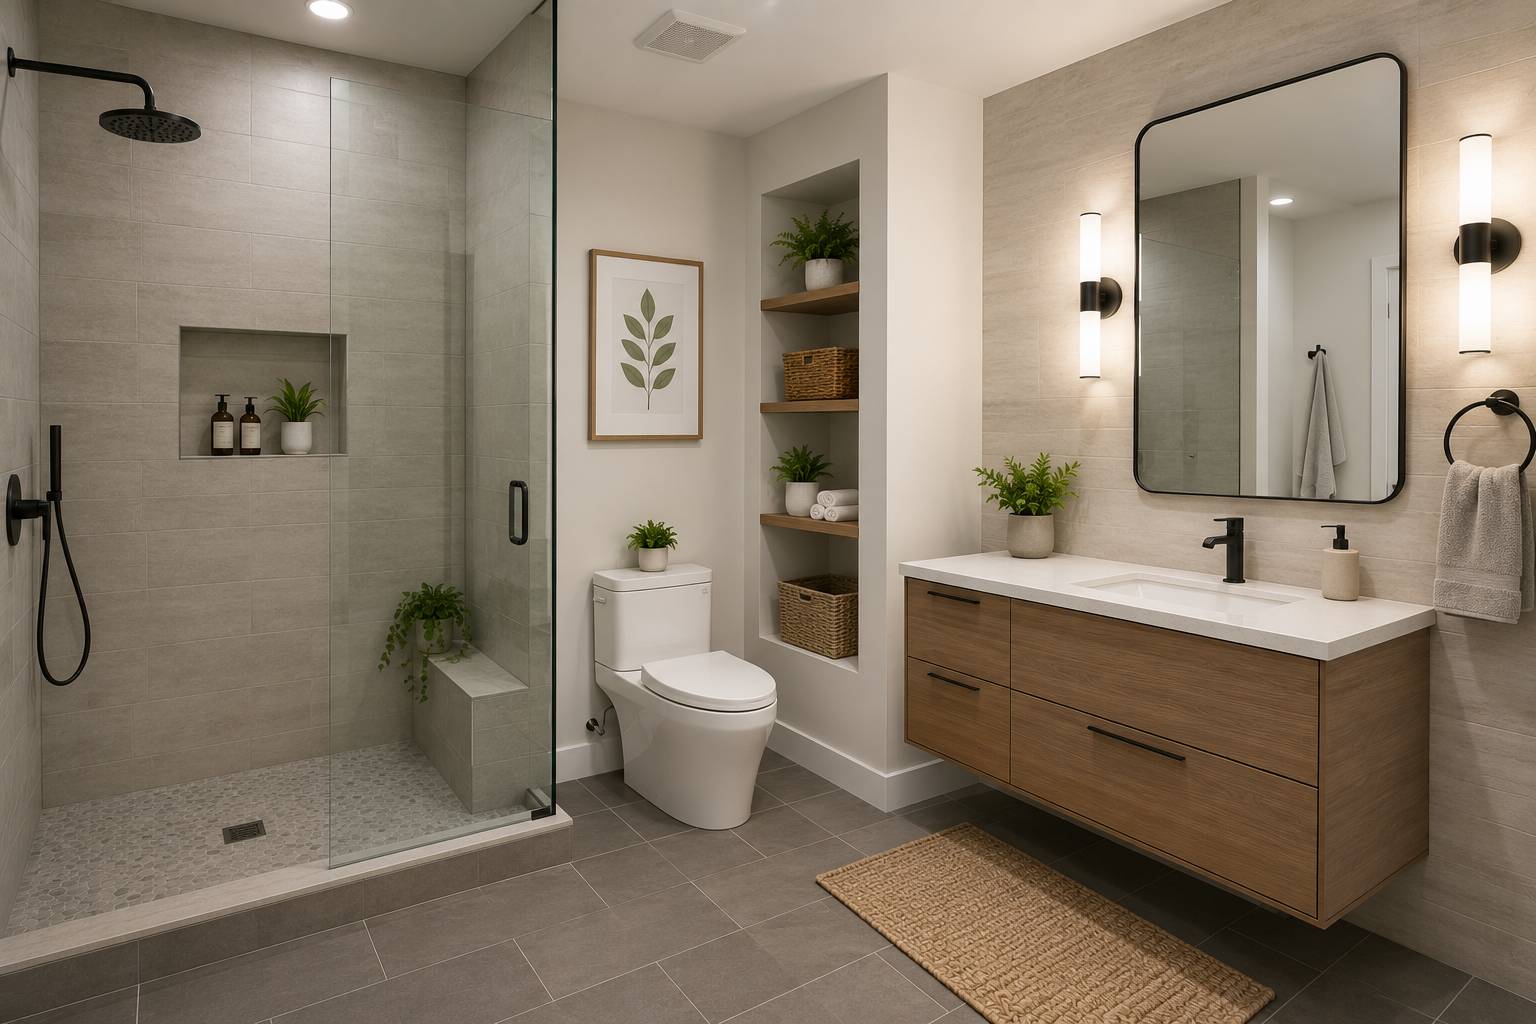
    You can eliminate tedious grout scrubbing entirely by switching to modern grout-free material systems. Sourcing seamless composite shower panels, pre-polished quartz countertops, undermount sinks, all-plywood kitchen cabinets configured for vanities, and waterproof LVP flooring directly from our Aiea warehouse allows you to build a spa-like, low-maintenance bathroom that stays clean with a simple wipe-down.

    Technical Performance Matrix: Traditional Tile vs. Modern Grout-Free Systems

    Before starting your bathroom renovation, compare how traditional tiled shower walls perform against modern grout-free materials in Hawaii’s humid environment:

    Performance Metric Traditional Tiled Shower Walls Modern Grout-Free Composite Shower Panels
    Grout Line Maintenance High; requires frequent scrubbing with harsh chemicals Zero grout lines; 100% non-porous wipe-clean surface
    Mold & Mildew Defense Low; porous cement grout absorbs moisture and breeds mold Superior; solid composite surface prevents water absorption
    Installation Speed Slow; multi-day process for tiling, grouting, and sealing Fast; large-format panels install in a fraction of the time
    Water Barrier Integrity Dependent on grout sealers; risk of hidden leaks Interlocking tongue-and-groove joints create a watertight shield
    Long-Term Chemical Sealing Requires annual grout re-sealing to prevent moisture damage $0 ongoing maintenance; never requires sealing or special polish

    3 Steps to Eliminate Grout Scrubbing for Good

    Creating a truly low-maintenance bathroom requires swapping out porous, high-maintenance materials for non-porous surfaces across all three key bathroom zones: shower walls, vanity countertops, and floors.

    1. Replace Shower Tile with Seamless Composite Wall Panels

    Traditional tiled showers can feature over 100 linear feet of porous grout lines. Modern composite shower panels cover full shower walls with continuous, stone-look sheets. Featuring precision interlocking joints and non-porous surface coatings, these wall panels prevent soap scum and hard water from adhering. Instead of using stiff scrub brushes and harsh chemical bleach, cleaning your shower walls is as easy as wiping them down with a damp microfiber cloth and mild soap.

    2. Pair Pre-Polished Quartz Tops with Undermount Sinks

    Bathroom vanities face daily exposure to water, toothpaste, cosmetics, and hair care products. Natural marble and granite tops require periodic sealing and absorb chemical stains, while top-mount (drop-in) sinks create a raised rim where grime collects.

    Upgrading to a pre-polished engineered quartz top paired with a vitreous china undermount sink creates a smooth, continuous surface. Water and debris can be wiped directly off the non-porous quartz deck straight into the sink basin, leaving no lips or crevices for mold to take root.

    3. Install Waterproof Rigid Core SPC Flooring

    Bathroom floor tile grout is notoriously difficult to clean, often turning dark and discolored over time from foot traffic and moisture.

    Replacing floor tile with 100% waterproof rigid core LVP flooring eliminates floor grout entirely. Built with a dense limestone-polymer composite core and a pre-attached IXPE sound-dampening pad, SPC vinyl planks withstand standing water, hairspray, and heavy daily use without warping, swelling, or delaminating.

    Material Specifications: Built for Island Humidity

    Selecting durable, water-resistant bathroom materials protects your home’s framing and subfloor from costly hidden water damage:

    Bathroom Zone Material Specification Island Performance Benefit
    Shower Enclosure Non-Porous Composite Wall Panels Eliminates grout lines; prevents water seepage behind drywall
    Vanity Cabinetry 100% Solid All-Plywood Box Framing Resists warping and swelling caused by hot shower steam
    Countertop Deck Pre-Polished Engineered Quartz Non-porous stain defense against cosmetics and bath products
    Bathroom Flooring Rigid Core Stone-Polymer Composite (SPC) 100% waterproof performance with a 20mil protective wear layer

    Our modular vanity cabinets feature solid all-plywood box construction paired with nickel-plated soft-close European hinges that operate smoothly and resist salt-air corrosion.

    Low-Maintenance Bathroom FAQs

    Can composite shower panels be installed over existing tile?

    In many cases, composite shower panels can be installed directly over existing ceramic tile, provided the tile wall is structurally sound, flat, clean, and free of loose tiles or hidden mold. Installing panels over existing tile saves time and demolition costs.

    Are grout-free shower panels resistant to scratches and impacts?

    Yes. High-quality composite shower panels are manufactured using dense, engineered polymer cores finished with durable, protective topcoats. They resist daily scratches, impact from dropped shampoo bottles, and fading from UV exposure.

    How do I clean engineered quartz vanity tops without damaging the finish?

    Clean engineered quartz vanity tops using warm water, mild dish soap, and a soft microfiber cloth. Avoid using harsh abrasive scrubbers, bleach, or highly acidic drain cleaners, which can dull the stone’s polished surface finish over time.

    Are undermount porcelain sinks secure enough to hold heavy water loads?

    Yes. Undermount porcelain sinks are secured to the underside of quartz countertops using high-strength epoxy, specialized mounting clips, and a continuous bead of 100% waterproof silicone. When properly installed, undermount sinks easily support a full basin of water without sagging or leaking.

    Can I inspect shower panels and quartz vanity tops in person?

    Yes. Visiting our Aiea showroom allows you to view full-size shower panel patterns, test soft-close vanity drawers, examine pre-polished quartz slabs under natural light, and select waterproof flooring options side-by-side. View our whole-home gallery to see completed bathroom installations across Oahu.

    Upgrade to a Low-Maintenance Bathroom Today

    Ready to eliminate grout scrubbing and simplify your bathroom cleaning routine? Visit the product specialists at Maikaʻi Import to check real-time stock levels, view physical samples, and receive a detailed project estimate:

    • Visit Our Regional Showroom: Inspect full-size shower panel displays, test soft-close vanity hardware, and view stone countertops at 98-019 Kamehameha Hwy #8, Aiea, HI 96701, inside the Harbor Center business complex.
    • Request an Estimate: Call our front sales counter at (808) 488-5678 during regular operating hours (Monday through Saturday, 8:00 AM to 5:00 PM) to confirm product availability and schedule material pickup.
    Get a Quote

  • Pre-Appraisal Renovations: Key Finishes That Boost Your Oahu Home’s Valuation

    Whether you are preparing to refinance your mortgage, secure a Home Equity Line of Credit (HELOC), or put your property on the market, a home appraisal plays a critical role in unlocking your property’s equity. Across Oahu—from Kailua coastal homes and Honolulu high-rise condos to Ewa Beach family subdivisions—an appraiser’s evaluation directly determines how much value your home commands in Hawaii’s real estate market.

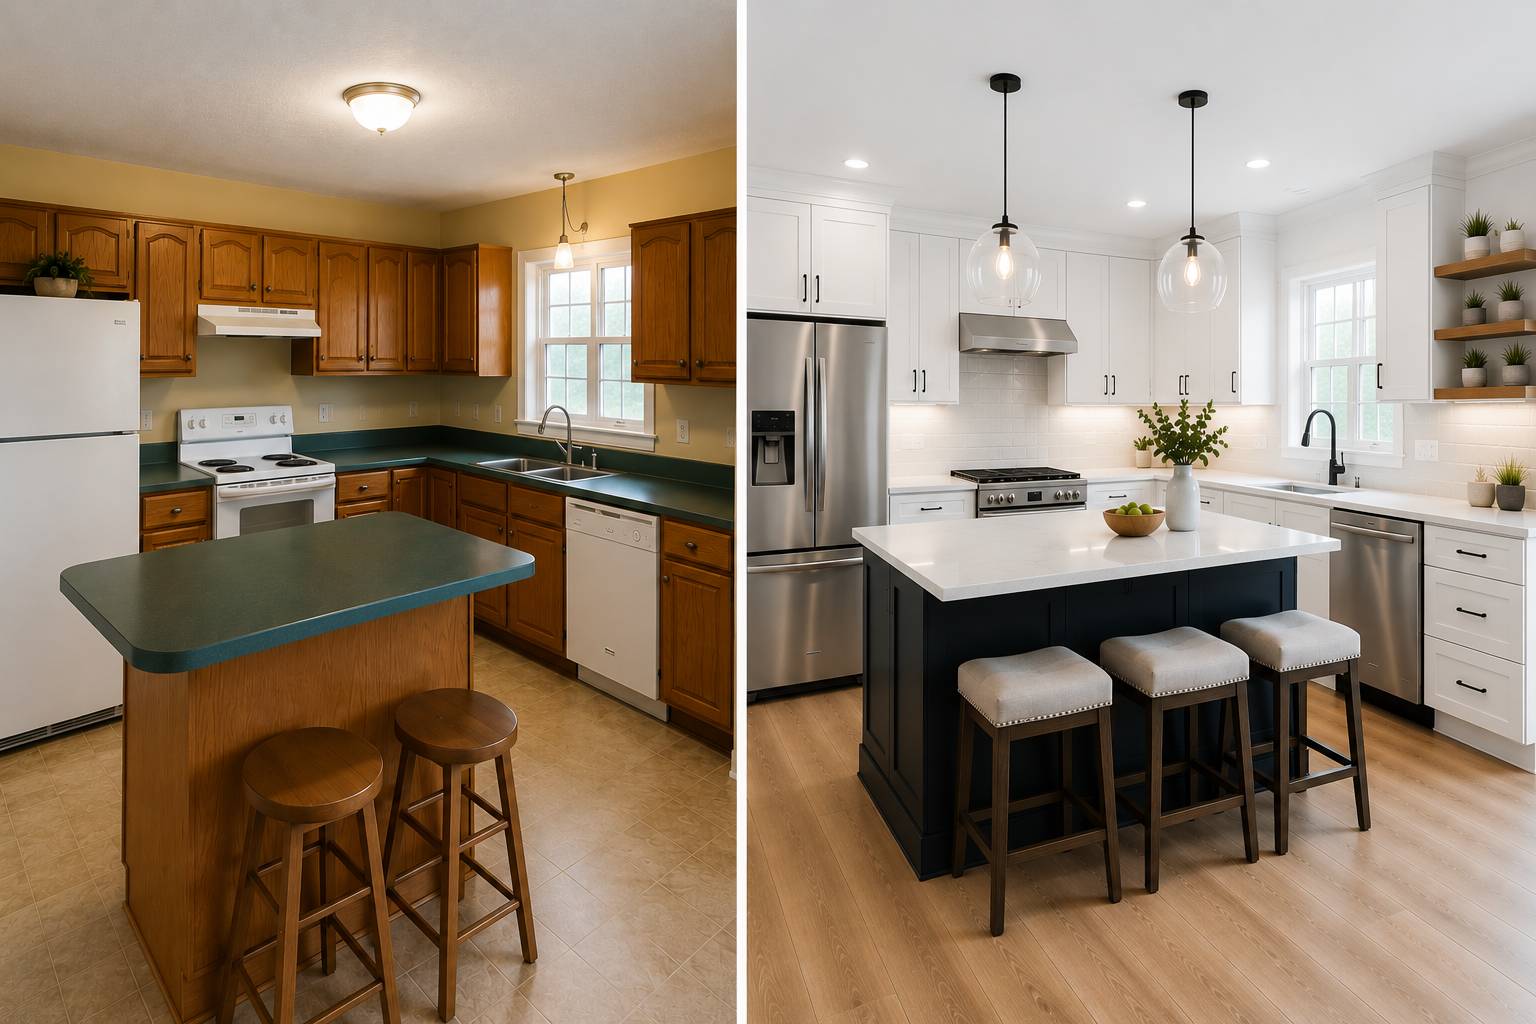
    When an appraiser evaluates your home, they look beyond square footage and neighborhood comparables. They assess the overall effective age, material quality, and interior condition of your living spaces. Outdated laminate counters, cracked tile grout, warped particleboard cabinets, and scratched flooring lower your property’s overall condition rating.

    Investing in targeted interior updates before the appraiser walks through your front door is one of the most effective ways to maximize your valuation. Sourcing pre-polished quartz countertops, modular all-plywood kitchen cabinets, waterproof LVP flooring, undermount sinks, and seamless shower panels directly from our Aiea warehouse allows you to achieve high-ROI upgrades quickly and cost-effectively.

    Technical ROI Matrix: Pre-Appraisal Finish Upgrades

    Before selecting finishes for a pre-appraisal refresh, evaluate how different interior material updates impact an appraiser’s condition rating and buyer perception:

    Interior Upgrade Zone Low-Appraisal Impact Material High-Valuation Finish Solution Appraiser Impact & ROI Benefit
    Kitchen Countertops Stained laminate or cracked tile & grout Pre-Polished Engineered Quartz Slabs High visual impact; improves effective kitchen age rating
    Cabinet Infrastructure Swollen particleboard or refaced old boxes 100% Solid All-Plywood Box Construction Demonstrates solid structural quality; eliminates termite concerns
    Main Floor Surfaces Worn carpet, scratched wood, or cracked tile Continuous Rigid Core SPC Vinyl (20mil) Creates unified visual flow; elevates flooring condition grade
    Bathroom Walls Mildewed shower tile with dark grout lines Non-Porous Composite Wall Panels Presents clean, turn-key wet area; eliminates deferred maintenance

    3 High-Impact Finishes That Impress Oahu Appraisers

    Appraisers assess homes using standard condition ratings ranging from C1 (brand new construction) down to C6 (severe structural defects). Most lived-in Hawaii homes fall into C3 or C4 categories. Modernizing key high-use surfaces upgrades your home’s rating, directly boosting its appraised value.

    1. Engineered Quartz Countertops

    The kitchen serves as the primary focal point during an appraisal inspection. Old laminate counter surfaces with peeling edges or discolored tile grout lines signal deferred maintenance to an appraiser.

    Replacing outdated decks with pre-polished engineered quartz instantly updates the space. Quartz offers a 100% non-porous, stain-resistant surface that stays pristine under tropical conditions. We stock pre-polished quartz slabs in standard architectural runs (110″ x 26″, 110″ x 36″, and 110″ x 42″) featuring pre-finished eased edges, allowing your installer to complete cross-cuts and drop-in undermount sink cutouts directly on-site to meet tight appraisal deadlines.

    2. Continuous Rigid Core SPC Vinyl Flooring

    Inconsistent flooring—such as carpet in the living room, ceramic tile in the kitchen, and laminate in the hallway—visually chops up your home’s floor plan and lowers its overall finish rating.

    Installing continuous wide-plank rigid core SPC vinyl flooring throughout main living spaces creates an unbroken visual flow that makes rooms feel larger. Featuring a 100% waterproof limestone core and a heavy-duty 20mil clear wear shield, rigid core SPC flooring withstands sand, wet paws, and heavy foot traffic. The pre-attached IXPE acoustic backing absorbs sound, giving your home a solid, quiet feel underfoot.

    3. All-Plywood Modular Cabinetry

    Appraisers look inside sink bases and open drawers to evaluate cabinet condition. Swollen particleboard sides, water-stained sink cabinets, or sagging shelves negatively impact your home’s structural rating.

    Upgrading to 100% all-plywood cabinet boxes with solid wood face frames demonstrates long-term quality. Cross-laminated plywood layers resist warping from island humidity and offer natural resistance to Formosan subterranean termites. Features like European soft-close hinges and full-extension undermount drawer slides highlight modern quality during inspection.

    Strategic Pre-Appraisal Renovation Hacks

    To maximize your return on investment before an appraisal, focus your budget on updates that deliver immediate visual appeal without requiring structural wall moves:

    • Stick to Neutral Color Palettes: Choose timeless cabinet finishes like White Shaker, High Gloss White, or light gray, paired with white quartz featuring subtle gray veining. Neutral finishes appeal to both appraisers and potential buyers.
    • Upgrade Bathrooms with Grout-Free Panels: Moldy shower grout lines suggest moisture problems to an appraiser. Replacing old shower tile with non-porous, stone-look composite shower panels provides a fresh, clean bathing space that wipes down in seconds.
    • Keep Materials In-Stock for Fast Completion: Appraisal scheduling often moves quickly. Waiting weeks for mainland special orders risks missing your appraisal window. Sourcing in-stock materials from our Aiea warehouse keeps your renovation timeline on track.

    Pre-Appraisal Renovation FAQs

    How far in advance of my appraisal should I complete interior updates?

    Complete all physical renovation work, cleanup, and paint touch-ups at least 24 to 48 hours before the appraiser arrives. Having all work finished allows the appraiser to take clear photos of complete, turn-key living spaces.

    Should I provide the appraiser with a list of recent upgrades?

    Yes. Prepare a written summary detailing all recent finish updates, complete with installation dates and material specifications (such as 100% all-plywood cabinetry, 20mil wear layer SPC flooring, and engineered quartz countertops). Hand this document to the appraiser during their walk-through.

    Does installing LVP flooring over old subfloors boost property valuation?

    Yes, provided the concrete or plywood subfloor is properly prepped and flat before installation. High-quality rigid core SPC vinyl flooring adds valuation by delivering an attractive, 100% waterproof, continuous floor surface that eliminates carpet odors and old tile damage.

    Will upgrading my kitchen cabinets offer a better ROI than remodeling the master bath?

    Kitchen updates generally offer a higher dollar-for-dollar return on appraisal valuations because the kitchen is considered the primary focal point of the home. However, updating both the kitchen and bathrooms using cohesive materials creates the strongest overall valuation impact.

    Can I pick up pre-appraisal renovation materials directly from your Oahu showroom?

    Yes. We keep a deep local stock of all-plywood modular cabinets, quartz slabs, waterproof SPC flooring, and shower panels at our Aiea facility. Your contractor can pick up complete material packages directly from our loading dock to keep your pre-appraisal timeline on schedule. Explore our whole-home gallery to view finished projects across the island.

    Maximize Your Oahu Home Valuation Today

    Ready to boost your home’s appraisal valuation with durable, high-ROI materials? Visit the product specialists at Maikaʻi Import to inspect stock levels, view physical samples, and receive a detailed project estimate:

    • Visit Our Regional Showroom: Inspect cabinet box construction, view full-size quartz slabs, test soft-close drawer slides, and examine flooring swatches at 98-019 Kamehameha Hwy #8, Aiea, HI 96701, located inside the Harbor Center business complex.
    • Request an Estimate: Call our front sales desk at (808) 488-5678 during regular operating hours (Monday through Saturday, 8:00 AM to 5:00 PM) to confirm product availability and schedule material pickup.
    Get a Quote

  • Ohana Unit Remodels: Smart Material Choices for Accessory Dwelling Units (ADUs)

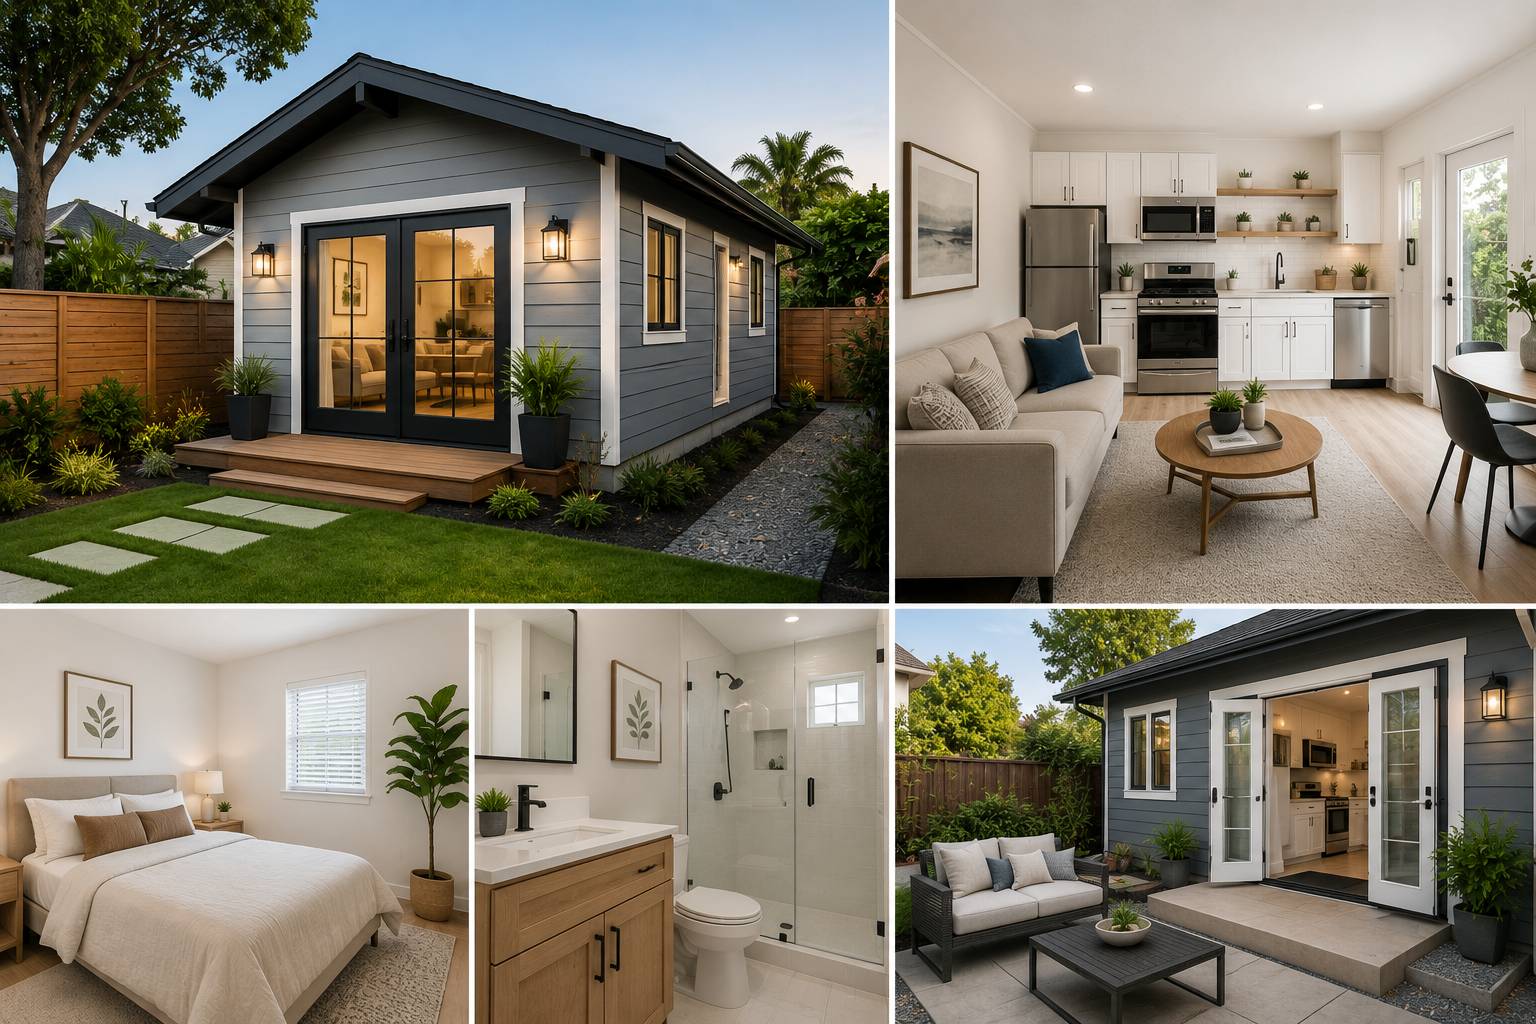
    Accessory Dwelling Units (ADUs) and Ohana units play a vital role in housing across Oahu. Whether building a detached backyard cottage in Kailua, converting a garage in Kapolei, or updating an attached multi-generational suite in Mililani, outfitting an Ohana unit requires a strategic approach to material selection.

    Ohana units face unique operational demands. Often rented to long-term tenants, utilized for multi-generational family living, or hosted as guest suites, these compact footprints experience concentrated foot traffic, frequent turnover, and high utility use. Property owners need building materials that deliver high visual appeal to attract quality occupants while offering low-maintenance durability that resists tenant wear, moisture, and pests.

    Designing a successful ADU kitchen and bathroom comes down to balancing spatial efficiency with commercial-grade durability. Sourcing 100% waterproof rigid core LVP flooring, modular all-plywood kitchen cabinets, pre-polished quartz countertops, undermount sinks, and seamless shower panels directly from our Aiea warehouse allows you to maximize rental yields, simplify turn-over maintenance, and build a lasting investment.

    Technical Performance Matrix: Material Selection for ADU & Rental Spaces

    Before selecting finishes for your Ohana unit or ADU remodel, evaluate how different building materials perform in high-turnover multi-family environments:

    Building Zone High-Maintenance Material (Avoid in ADUs) High-Yield ADU Material Solution Primary Long-Term Property Benefit
    Main Flooring Sheet vinyl or soft wood laminate Rigid Core SPC Vinyl (20mil Wear Shield) 100% waterproof; scratch-resistant against pets and furniture legs
    Kitchen Cabinets Particleboard or MDF foil-wrapped boxes 100% Solid All-Plywood Construction Resists humidity swelling, termite damage, and heavy tenant use
    Countertop Decks Laminate plastic or natural porous stone Pre-Polished Engineered Quartz Slabs Non-porous stain resistance against coffee, shoyu, and oil spills
    Shower Enclosures Tiled walls with porous cement grout lines Non-Porous Composite Wall Panels Wipes clean instantly; eliminates tile grout scrubbing and mold calls

    4 Strategic Material Choices for High-Yield Ohana Units

    When space is restricted—typically between 400 and 800 square feet for standard Oahu ADU permits—every material chosen must perform double duty by expanding visual space while standing up to heavy daily use.

    1. Continuous Waterproof Rigid Core SPC Flooring

    In compact living spaces, changing flooring materials between the entry, kitchen, and bathroom visually chops up the floor plan, making the ADU feel smaller. Installing continuous wide-plank rigid core SPC vinyl flooring across the entire unit creates a seamless visual flow.

    Featuring a dense limestone composite core and a pre-attached IXPE acoustic cushion, our SPC flooring is 100% waterproof and dampens footfall noise between levels. The heavy-duty 20mil clear wear shield protects against shoe scuffs, heavy furniture, and tracked-in beach sand, eliminating the need for costly floor replacement between tenant leases.

    2. Modular All-Plywood Cabinetry Built for Termite Resistance

    Rental property kitchens require sturdy cabinet construction. Particleboard cabinets often absorb moisture from plumbing drips under the sink or humid tropical air, causing doors to sag, hinges to pull free, and shelves to bow.

    Our cabinetry collections feature 100% all-plywood box framing, solid wood face frames, and soft-close European hardware. Cross-laminated plywood layers offer natural resistance to Formosan subterranean termites and withstand ambient humidity without swelling. Using standard modular cabinet configurations allows you to maximize vertical storage up to 36-inch or 42-inch upper wall height without paying custom millwork prices.

    3. Stain-Proof Pre-Polished Quartz Countertops

    Countertops in rental spaces frequently encounter hot cookware, spilled shoyu, citrus acids, and heavy appliances. Natural marble and granite require routine sealing and easily stain if a tenant leaves a spill overnight. Plastic laminate burn marks and peeling edges ruin kitchen aesthetics.

    Engineered quartz provides a completely non-porous, scratch-resistant surface that never requires chemical sealers. We stock pre-polished quartz slabs in standard architectural runs (110″ x 26″, 110″ x 36″, and 110″ x 42″) with pre-finished eased front edges. Your installation crew can execute straight cuts and drop-in undermount sink cutouts directly on-site, keeping your ADU construction timeline on schedule.

    4. Grout-Free Shower Wall Panels for Instant Turnover

    Bathroom maintenance represents one of the largest ongoing headaches for rental property owners. Traditional tiled showers feature dozens of feet of porous cement grout lines that absorb water, trap soap scum, and breed black mold in humid island environments.

    Replacing shower tile with non-porous, stone-look shower panels creates a sleek, grout-free bathing enclosure. Waterproof composite panels lock together tightly, wiping clean with a basic cloth and mild soap. Eliminating grout lines prevents water leaks behind shower walls, protecting your ADU subfloor framing from hidden dry rot.

    Maximize ROI with Factory-Direct In-Stock Materials

    For property owners building or remodeling an ADU on Oahu, timing directly impacts return on investment. Every week your Ohana unit remains under construction is a week of lost rental income or delayed family move-in.

    Waiting 8 to 12 weeks for mainland special-order cabinets or custom stone fabrication stalls your project. Sourcing materials directly from our Aiea warehouse offers immediate advantages:

    • Immediate Inventory Availability: Pick up complete kitchen, bath, and flooring packages directly from our Aiea loading dock to keep trade crews working without shipping delays.
    • Wholesale Price Efficiency: Factory-direct pricing lowers your initial capital expenditure, shortening your payback period and improving net rental yield.
    • Standardized Material Replacement: Using standard stock colors and modular cabinet sizes ensures that if a single cabinet door or floor plank ever needs replacement down the road, matching stock is locally accessible.

    ADU & Ohana Remodel FAQs

    What is the best cabinet color for a small rental Ohana unit?

    Bright neutral colors like White Shaker or High Gloss White are ideal for compact ADU kitchens. White cabinetry reflects natural ambient light, making small kitchen spaces feel wider and brighter. White finishes also appeal to the broadest range of prospective tenants.

    Can I install SPC vinyl flooring in an ADU bathroom and laundry room?

    Yes. Rigid core SPC vinyl flooring is constructed with zero wood fibers and a 100% waterproof limestone-polymer core. It will not warp, swell, or buckle when exposed to surface water from bathroom sinks, showers, or washing machine spills.

    Are undermount sinks better than drop-in sinks for rental properties?

    Yes. Undermount stainless steel sinks mounted beneath quartz countertops eliminate the raised outer lip where food crumbs and moisture collect. Tenants can wipe food prep debris straight off the smooth quartz surface into the sink basin, keeping the kitchen clean and preventing caulk deterioration.

    How do modular cabinets fit tight ADU kitchen footprints?

    Our modular cabinet system is engineered in standard 3-inch width increments (ranging from 9 inches to 36 inches). Contractors can combine various drawer banks, sink bases, and wall boxes to fit any wall dimension. Matching solid wood filler strips seal any remaining small gaps flush against the drywall.

    Can I view ADU material packages in person at your Oahu showroom?

    Yes. Visiting our Aiea showroom allows you to examine our 100% all-plywood cabinet box construction, feel rigid core SPC flooring textures, test soft-close hardware, and review quartz countertop slabs side-by-side. Explore our whole-home gallery to view finished ADU and residential projects across Oahu.

    Build Your Low-Maintenance ADU Today

    Ready to outfit your Ohana unit or ADU with durable, low-maintenance materials tailored for Hawaii rental properties? Visit the product specialists at Maikaʻi Import to check real-time stock levels, view physical samples, and receive a line-item estimate:

    • Visit Our Regional Showroom: Inspect cabinet box construction, test soft-close drawer slides, examine shower panels, and compare stone countertops at 98-019 Kamehameha Hwy #8, Aiea, HI 96701, located inside the Harbor Center business complex.
    • Request an Estimate: Call our front sales counter at (808) 488-5678 during regular operating hours (Monday through Saturday, 8:00 AM to 5:00 PM) to confirm product availability and schedule material pickup.
    Get a Quote

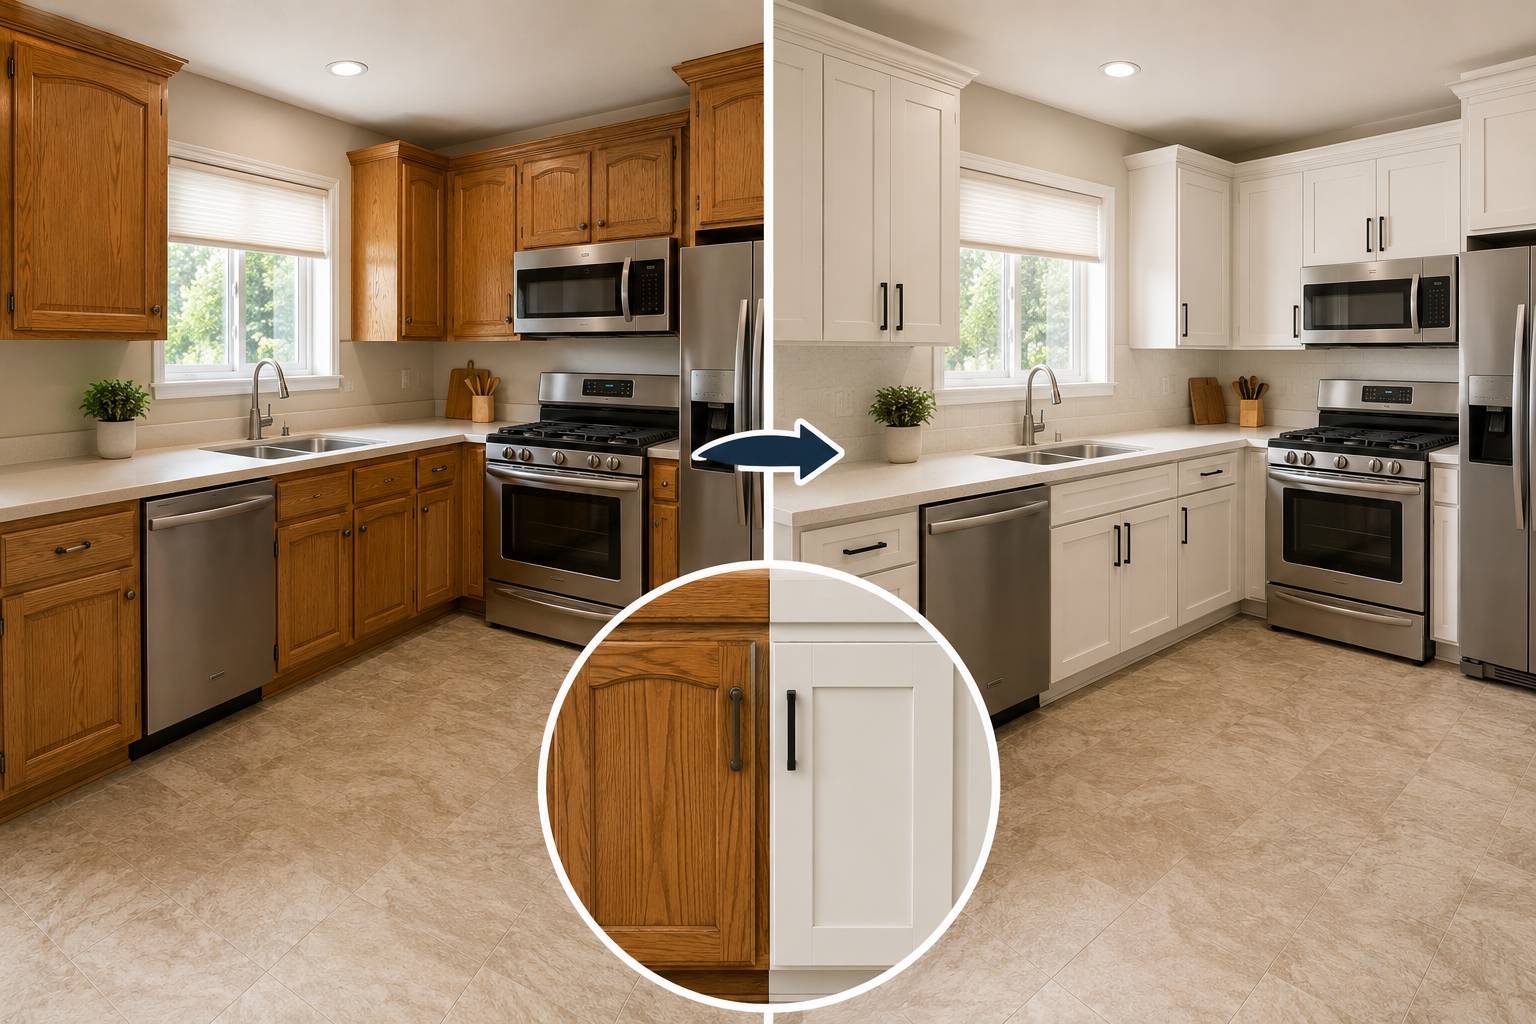
  • Cabinet Refacing vs. Full Replacement: Knowing When It’s Time to Rebuild

    Planning a kitchen renovation on Oahu always starts with a critical decision: should you reface your existing cabinets or tear them out for a full replacement?

    Cabinet refacing—the process of keeping your existing cabinet box structure while replacing door fronts, drawer faces, and applying a thin veneer to exterior frames—is often marketed as a fast, low-cost shortcut. For homes in drier, mainland climates, refacing can occasionally make sense for cosmetic refreshes.

    However, Hawaii’s unique tropical environment introduces structural challenges that mainland home improvement advice frequently overlooks. High humidity, salt-laden trade winds, subterranean termite activity, and aging plumbing fixtures take a heavy toll on internal cabinet box structures. Applying brand-new doors over compromised cabinet boxes often wastes money on a temporary cosmetic fix.

    Understanding when a simple cosmetic update will work versus when it is time to tear down to the studs ensures your renovation dollars are spent wisely. Sourcing 100% all-plywood kitchen cabinets, paired with pre-polished quartz countertops, undermount sinks, and waterproof LVP flooring directly from our Aiea warehouse, provides your home with a fresh foundation built for island living.

    Technical Comparison Matrix: Cabinet Refacing vs. Full Replacement

    Before deciding whether to reface or replace your cabinetry, evaluate how both options compare across key job site, structural, and financial metrics in Hawaii:

    Evaluation Factor Cabinet Refacing (Cosmetic Overlay) Full Cabinet Replacement (Complete Rebuild)
    Primary Material Used Thin wood veneer or thermofoil doors glued over old boxes 100% Solid All-Plywood Box Construction + Solid Face Frames
    Hidden Damage Resolution Leaves internal termite damage, swollen particleboard, and mold hidden Eliminates all underlying pest damage, rot, and hidden wall mold
    Layout & Storage Flexibility Locked into existing footprint; cannot add drawers or change workflow 100% layout freedom; optimize drawer banks and extend upper height
    Heavy Countertop Support Relies on old cabinet boxes to hold heavy 3cm quartz stone slabs Engineered all-plywood frames easily support thick quartz decks
    Long-Term Hawaii Lifespan Veneers peel under high humidity within 3–5 years Decades of structural stability; resistant to swelling and termites
    Overall Cost Value Ratio High labor costs for veneer wrapping; low structural ROI Maximum long-term value; complete refresh of kitchen infrastructure

    4 Signs It Is Time to Skip Refacing and Rebuild Completely

    While refacing might seem appealing on paper, hidden structural defects across Oahu homes often make full cabinet replacement the safer, more cost-effective choice.

    1. Swollen Particleboard or MDF Box Frames

    Many older homes and townhomes in Kapolei, Mililani, and Ewa Beach were originally built with builder-grade particleboard or medium-density fiberboard (MDF) cabinet boxes. In Hawaii’s humid climate, moisture causes particleboard to expand, crumble, and delaminate. Glue and adhesive veneers will not stick properly to swollen or crumbling particleboard. If your cabinet sides or sink bases are soft, swollen, or flaking, refacing is not a viable option.

    2. Subterranean Termite and Pest Activity

    Formosan subterranean termites are a constant reality across Oahu. Termites frequently attack cabinet boxes from behind drywall, eating away the structural plywood or composite wood frames while leaving the outer painted finish intact. Refacing old cabinets without inspecting behind the boxes risks attaching expensive new doors to a hollowed-out frame that could collapse under heavy stone countertops.

    3. Outdated, Inefficient Kitchen Layouts

    Refacing locks you into your existing kitchen footprint. If your current kitchen features a cramped galley layout, lacks drawer space, or leaves dead space in corner cabinets, refacing only puts a fresh face on an inefficient design. A full cabinet replacement allows you to convert two-door base cabinets into full-extension drawer banks, add vertical spice pull-outs, and run 36-inch or 42-inch upper wall cabinets straight to the ceiling line.

    4. Planning for Heavy Quartz Countertops

    Engineered quartz countertops are thick and heavy, weighing up to 15 to 20 pounds per square foot. Installing a heavy 3cm quartz slab over old, compromised cabinet boxes that have been modified for refacing is a dangerous gamble. A complete cabinet rebuild using solid all-plywood box framing ensures your sub-structure can support heavy quartz decks, waterfall islands, and undermount sinks without sagging or cracking.

    The Value Analysis: Why Replacement Wins in Hawaii

    Homeowners are often surprised to learn that professional cabinet refacing in Hawaii carries high labor costs. Refacing requires a skilled craftsman to spend days meticulously sanding, measuring, cutting, and applying thin wood veneers over every exposed face frame on-site.

    Because specialty trade labor rates on Oahu are high, the labor cost for refacing often approaches the cost of purchasing brand-new, modular all-plywood cabinet boxes.

    By choosing a full cabinet replacement with our ready-to-assemble (RTA) or pre-assembled modular cabinet lines, you receive:

    • 100% Solid All-Plywood Construction: Cross-laminated plywood layers bound with waterproof adhesives resist tropical ambient humidity without warping.
    • Brand-New European Hardware: Every cabinet includes concealed, nickel-plated soft-close hinges and full-extension undermount drawer glides that operate smoothly and quietly.
    • A Clean Slate: Tearing out old cabinets gives your general contractor the opportunity to inspect plumbing lines under the sink, update electrical outlets, fix drywall, and treat any hidden wall mold before new cabinets are set.

    You can complete your home rebuild by pairing your replacement cabinetry with continuous rigid core LVP flooring and low-maintenance shower panels for a cohesive, long-lasting renovation.

    Cabinet Refacing vs. Replacement FAQs

    Is cabinet refacing ever a good idea for an Oahu home?

    Refacing can work if your existing cabinet boxes are built from high-grade, solid hardwood plywood, show zero signs of water damage, mold, or termite activity, and you are 100% satisfied with your current kitchen layout. However, if your cabinets are made of particleboard or are over 15 years old, a full replacement offers far better long-term value.

    How much longer does a full cabinet replacement take compared to refacing?

    Refacing typically takes 3 to 5 days of delicate on-site work. A full cabinet teardown and replacement takes roughly 2 to 4 days for cabinet demolition and box installation. While replacing cabinets requires removing your existing countertops, sourcing in-stock modular cabinets and pre-polished quartz from our Aiea warehouse keeps your total project timeline fast.

    Can I save money by assembling and installing replacement cabinets myself?

    Yes. Choosing flat-packed RTA (Ready-to-Assemble) all-plywood cabinets allows handy homeowners or DIYers to assemble cabinet boxes off-site, saving significantly on trade labor costs. Our precision interlocking system allows a standard box to be assembled in 10 to 15 minutes.

    Will replacing my cabinets damage my existing drywall or flooring?

    Tearing out old cabinets can leave minor wall marks or expose bare subfloor areas where old cabinet toe kicks rested. However, because new modular cabinets follow standard dimensional footprints, installing continuous waterproof SPC vinyl flooring across the room before setting new cabinets creates a clean, seamless finish.

    Can I inspect cabinet box materials and physical door samples before deciding?

    Yes. Visiting our Aiea showroom allows you to inspect our 100% all-plywood box construction, feel solid wood face frames, test soft-close hardware, and review door finish options side-by-side. Explore our whole-home gallery to see finished replacement projects across Oahu.

    Rebuild Your Kitchen with Confidence Today

    Ready to replace your worn cabinets with durable, all-plywood cabinetry built to withstand Hawaii’s climate? Visit the product specialists at Maikaʻi Import to check real-time stock levels, view physical samples, and receive a detailed project estimate:

    • Visit Our Regional Showroom: Inspect cabinet box construction, test soft-close drawer slides, and compare stone countertops at 98-019 Kamehameha Hwy #8, Aiea, HI 96701, located inside the Harbor Center business complex.
    • Request an Estimate: Call our front sales desk at (808) 488-5678 during regular operating hours (Monday through Saturday, 8:00 AM to 5:00 PM) to confirm product availability and schedule material pickup.
    Get a Quote

  • Undermount vs. Drop-In Sinks: Which Basin Configuration Fits Quartz Best?

    Upgrading your kitchen or bathroom countertops with engineered quartz is one of the most effective investments you can make for your Oahu home. Whether you are renovating a high-rise condo in Kakaʻako, a single-family residence in Kailua, or a townhome in Kapolei, pre-polished quartz offers a 100% non-porous, stain-resistant surface built for active island living.

    However, selecting your quartz slab color and veining pattern is only half the design equation. Choosing the right sink basin configuration—specifically comparing an undermount sink to a traditional drop-in (top-mount) sink—directly impacts your kitchen’s daily functionality, cleaning routine, and long-term durability.

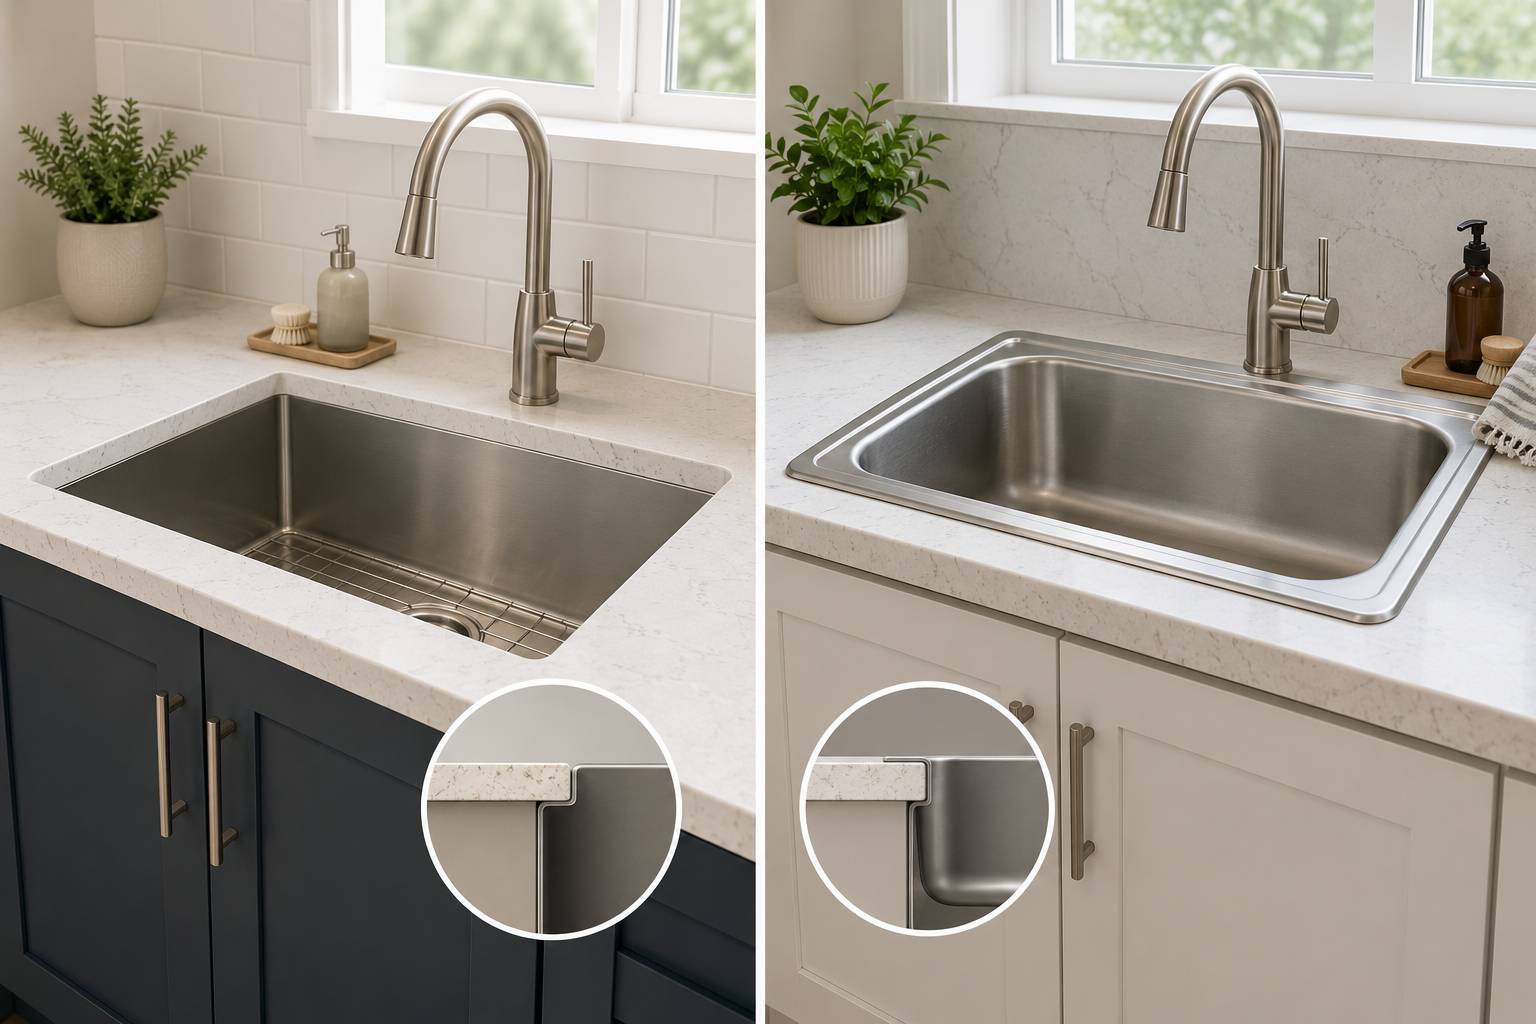
    While both basin configurations serve the same core purpose, mounting a sink beneath an engineered quartz deck unlocks distinct advantages over traditional surface-mounted rim sinks.

    Sourcing pre-cut quartz countertops, undermount stainless steel and porcelain sinks, all-plywood kitchen cabinets, and waterproof LVP flooring directly from our Aiea warehouse ensures your sink installation delivers clean lines and worry-free performance.

    Technical Comparison Matrix: Undermount vs. Drop-In Sinks

    Before finalizing your kitchen or bathroom countertop order, evaluate how undermount and drop-in sinks perform when paired with engineered quartz:

    Performance Metric Undermount Sink Configuration Drop-In (Top-Mount) Sink Configuration
    Visual Aesthetics Sleek, continuous counter surface; showcases polished quartz edge Raised perimeter rim breaks up quartz pattern and covers stone edge
    Counter Cleanup & Hygiene Wipe food crumbs and spills directly into the basin with no lip Grime, moisture, and food particles collect along the raised silicone rim
    Usable Countertop Space Maximizes usable deck space around sink perimeter Outer metal or porcelain rim reduces usable flat stone surface
    Mold & Mildew Defense Sealed silicone joint beneath stone prevents surface mold growth Caulk line around raised rim exposed to light and water, fostering mildew
    Installation Complexity Requires precise polished quartz cutout and undermount mounting clips Simple drop-in cutout; supported by top perimeter rim resting on deck
    Countertop Material Compatibility Ideal for solid stone (Quartz, Granite); unsuited for laminate/particleboard Compatible with all counter materials, including cheap laminate

    3 Reasons Undermount Sinks Work Best with Quartz Countertops

    Engineered quartz is manufactured by combining natural quartz minerals with high-performance polymer resins under intense pressure. This creates a solid, dense, water-impermeable slab. Because quartz is solid throughout, mounting an undermount sink to its underside takes full advantage of the stone’s physical properties.

    1. Highlight the Polished Edge Profile

    When installing a drop-in sink, a metal or porcelain flange covers 1 to 2 inches of the countertop cutout on all sides. This completely hides the interior cut edge of your quartz slab.

    An undermount sink mounts entirely beneath the stone deck. This leaves the interior edge of the quartz exposed, showcasing the finished eased edge profile and revealing the full depth and veining of your stone.

    2. Seamless “Sweep-In” Counter Hygiene

    In a busy Hawaii kitchen, preparing fresh seafood, chopping fruits, and wiping down counters after meals is an everyday task. With a drop-in sink, the raised outer rim creates a physical barrier. You cannot wipe liquid or food crumbs off the counter without them catching along the sink’s edge caulking.

    With an undermount sink setup, the transition from quartz to sink basin is flat and continuous. You can wipe food prep crumbs, water splashes, and debris straight off the smooth quartz surface directly down into the sink bowl with a single motion.

    3. Preventing Black Mold and Scum Buildup

    Oahu’s warm, humid climate makes moisture-prone areas around kitchen and bathroom sinks susceptible to black mold and mildew. Drop-in sinks feature a exposed silicone sealant line running along the top of the countertop. Over time, constant exposure to soap scum, standing water, and sunlight causes this visible silicone seam to discolor, turn dark, and peel away.

    Undermount sink sealant is applied beneath the quartz overhang, protected from direct ambient light and physical scrubbing. This hidden silicone seal stays clean, dry, and protected, preventing mold growth and keeping your kitchen hygienic.

    Installation Mechanics: Securing Undermount Sinks to Quartz

    A common concern among homeowners is whether an undermount sink filled with dishwater or a heavy cast-iron pot can pull away from the bottom of a quartz deck.

    When installed using correct industry techniques, an undermount sink system easily supports heavy daily loads.

    1. High-Strength Structural Anchors and Epoxy

    Professional installers do not rely on silicone glue alone to support an undermount sink. Threaded brass inserts or specialized undermount mounting clips are anchored into the underside of the quartz slab using high-strength two-part epoxy. These mechanical clips pull the sink rim firmly against the bottom face of the stone.

    2. Continuous Waterproof Silicone Seal

    A heavy bead of 100% neutral-cure silicone is applied between the top lip of the sink rim and the underside of the quartz slab. When the mounting clips are tightened, the silicone compresses, forming a 100% watertight seal that prevents water from leaking down into your wooden cabinet box.

    3. Heavy-Duty Plywood Cabinet Support

    Supporting a 3cm engineered quartz slab, a double-bowl undermount sink, and full water capacity requires a rigid cabinet foundation. Our modular cabinet lines feature 100% solid all-plywood box construction with solid wood face frames. Solid plywood side walls and corner braces hold their structural shape without sagging or flexing, ensuring your sink and countertop remain stable over time.

    You can complete your kitchen upgrade by pairing your pre-polished quartz countertops and undermount sink package with our non-porous shower panels for bathrooms and waterproof LVP flooring throughout your living areas.

    Undermount vs. Drop-In Sink FAQs

    Can I install an undermount sink on laminate countertops?

    No. Undermount sinks should not be installed on traditional laminate countertops because laminate uses a particleboard or MDF wood core. Exposing the inner wood core of a laminate sheet to water along an undermount rim causes the particleboard to swell and delaminate. Solid surfaces like engineered quartz, granite, or solid stone are required for undermount sinks.

    What are standard pre-polished quartz slab sizes for kitchen sink cutouts?

    We stock pre-polished quartz countertops in standard architectural lengths (110″ x 26″, 110″ x 36″, and 110″ x 42″) with factory-finished eased front edges. Your installer executes straight perimeter cuts and trims the undermount sink opening directly on site to match your specific sink bowl dimensions.

    Should I choose a stainless steel or porcelain undermount sink for my quartz kitchen counters?

    Both materials perform exceptionally well beneath quartz. 16-gauge 304-grade stainless steel undermount sinks offer heavy-duty commercial durability, scratch resistance, and easy maintenance for high-use kitchens. Vitreous china porcelain undermount sinks provide a smooth, traditional look that pairs beautifully with white Calacatta quartz in bathroom vanities and powder rooms.

    How do I clean the undermount sink seam where the stone meets the basin?

    Clean the undermount seam periodically using a soft nylon brush dipped in warm water and mild dish soap. Scrub gently along the lip overhang to remove any soap film buildup. Avoid using abrasive steel wool pads or harsh acidic chemicals that could etch the polished quartz edge.

    Can I view quartz slab options and undermount sinks in person?

    Yes. Visiting our Aiea showroom allows you to inspect full-size engineered quartz slabs under natural light, examine undermount stainless steel and porcelain sink basins, and test soft-close cabinet hardware side-by-side. Explore our whole-home gallery to view completed quartz and sink installations in homes across Oahu.

    Upgrade Your Kitchen Countertops Today

    Ready to install pre-polished quartz countertops paired with a seamless undermount sink in your home? Visit the product specialists at Maikaʻi Import to inspect stone slabs, check real-time inventory, and receive a comprehensive project estimate:

    • Visit Our Regional Showroom: Examine full-size quartz slabs, test undermount sink displays, and view cabinet finishes at 98-019 Kamehameha Hwy #8, Aiea, HI 96701, located inside the Harbor Center business complex.
    • Request an Estimate: Call our front sales counter at (808) 488-5678 during regular operating hours (Monday through Saturday, 8:00 AM to 5:00 PM) to confirm product availability and schedule material pickup.
    Get a Quote

  • Subfloor Prep 101: How to Fix Uneven Concrete Before Laying LVP on Oahu

    Installing rigid core luxury vinyl plank (LVP) flooring is one of the most effective ways to upgrade a home on Oahu. Whether you are renovating a single-family residence in Kailua, a townhome in Kapolei, or a high-rise condo in Kakaʻako, vinyl plank delivers a 100% waterproof, pet-friendly surface built for Hawaii’s tropical environment.

    However, the secret to a flawless, long-lasting floor installation does not lie in the planks themselves—it lies underneath them. On Oahu, most residential ground floors and condo units consist of poured concrete slabs. Over time, ground settling, moisture migration, and rough original pours leave concrete slabs with dips, humps, hairline cracks, and high spots.

    Laying click-lock LVP directly over an unlevel concrete subfloor can lead to bouncing planks, hollow sounds underfoot, cracked locking joints, and telegraphing imperfections over time.

    Sourcing high-density stone-polymer composite (SPC) LVP flooring, paired with modular kitchen cabinets and pre-polished quartz countertops directly from our Aiea warehouse, gives your home a solid foundation. Following proper subfloor preparation protocols ensures your continuous flooring looks and performs like a professional installation for decades.

    The Oahu Concrete Reality: Common Subfloor Imperfections

    Before laying down a single plank of LVP, evaluate the condition of your concrete slab against key industry installation tolerances:

    Concrete Subfloor Issue Primary Cause on Oahu Long-Term Risk to Click-Lock LVP Recommended Corrective Action
    Dips & Low Spots Poor original concrete troweling or slab settling Planks flex downward, causing hollow sounds and broken click joints Fill with self-leveling underlayment or high-strength patch compound
    Humps & High Spots Slab heaving or uneven expansion joints Planks ridge over high points, causing severe wear and joint disengagement Grind down concrete high spots using a diamond-cup wheel angle grinder
    Hairline Cracks Ground movement and curing shrinkage Moisture vapor migration and telegraphing lines through thin planks Clean, prime, and bridge cracks with flexible concrete crack filler
    Excess Slab Moisture High water tables and tropical humidity Vapor pressure buildup beneath planks causing mold or adhesive breakdown Perform moisture test and install a 6mil polyethylene vapor barrier

    Step-by-Step Guide: Prepping Your Concrete Slab for LVP

    Floor manufacturers require concrete subfloors to be flat within 3/16 inch over a 10-foot radius (or 1/8 inch over 6 feet). Following a systematic preparation process guarantees your subfloor meets these strict installation standards.

    Step 1: Deep Clean and Strip the Slab

    Remove all old flooring, carpet tack strips, tile adhesive, paint overspray, and drywall mud. Use a heavy-duty scraper to strip old carpet glue or vinyl mastic flush down to raw concrete. Sweep thoroughly and vacuum the entire floor using a HEPA shop vacuum to remove microscopic dust that prevents leveling compounds from bonding.

    Step 2: Map the Subfloor with a Straightedge

    Set a 10-foot aluminum straightedge or long carpenter’s level across the floor. Pivot the bar across room corners to identify high and low spots. Mark dips deeper than 3/16 inch using chalk circles, and highlight raised concrete humps with an X.

    Step 3: Grind Down High Points

    For raised ridges or high spots along expansion joints, wear a dust mask and use a concrete grinder equipped with a diamond cup wheel and a vacuum dust shroud. Grind high areas down flush until the straightedge rests flat across the surface.

    Step 4: Prime and Apply Leveling Compound

    For low dips and recessed areas, apply an acrylic concrete primer over the cleaned slab to ensure proper adhesion. Mix a cementitious self-leveling underlayment or floor patch compound with clean water according to package instructions. Pour the liquid compound into the marked low spots, spreading it smoothly using a feather-edge trowel. Allow the patch to cure completely (typically 4 to 24 hours depending on humidity levels).

    Step 5: Install a 6mil Moisture Vapor Barrier

    Ground-level concrete slabs on Oahu absorb ground moisture, releasing invisible water vapor upward into living spaces. Before clicking your SPC vinyl planks together, lay down a continuous 6mil polyethylene vapor barrier film across the concrete. Overlap sheet seams by 6 inches and seal them tightly with waterproof moisture tape.

    Why Rigid Core SPC Vinyl Forgives Minor Subfloor Imperfections

    While thorough subfloor preparation is essential for any floor installation, the type of LVP you select dictates how forgiving the plank is over real-world subfloors.

    Older, flexible Luxury Vinyl Tile (LVT) and thin glue-down vinyl copy every bump, dip, and crack in the concrete beneath them—a defect known as telegraphing.

    Our Standard 7 Series (6.5mm) and Premium 9 Series (7mm) feature a high-density Stone-Polymer Composite (SPC) rigid core made from natural limestone powder and virgin PVC resin.

    • Bridge Structural Micro-Dips: The dense, rigid limestone core acts like a solid bridge over minor concrete surface imperfections, preventing telegraphing lines.
    • Integrated IXPE Foam Backing: Every plank includes a pre-attached high-density IXPE acoustic cushion that absorbs minor surface grit and dampens footfall noise without needing separate underlayment rolls.
    • Heavy Joint Strength: Rigid SPC planks prevent the locking mechanisms from flexing, protecting joints from cracking under heavy foot traffic or heavy furniture loads.

    You can complete your home makeover by combining your level floors with our custom-look shower panels and undermount sinks for a low-maintenance interior package.

    Concrete Subfloor Prep FAQs

    Do I need a separate foam underlayment if my LVP already has pre-attached IXPE padding?

    No. You should never install a second layer of soft foam underlayment beneath LVP planks that already feature pre-attached IXPE cushion backing. Adding extra soft foam creates too much cushion beneath the floor, causing the click-lock joints to flex and snap under foot pressure.

    How long must new concrete cure before I can install SPC vinyl flooring over it?

    Newly poured concrete slabs must cure for a minimum of 60 to 90 days before installing LVP. Always perform a calcium chloride or relative humidity (RH) moisture test on new concrete to confirm moisture emission levels meet manufacturer guidelines before laying flooring.

    Can I use wood floor leveling compound over a concrete subfloor?

    No. Always use a cement-based self-leveling underlayment or concrete patch for concrete slabs. Wood-based patching compounds lack the structural bonding strength required for concrete and can break down under ambient moisture exposure.

    What happens if I install LVP over an unlevel concrete floor without leveling it first?

    Installing click-lock LVP over uneven concrete causes the planks to bounce or feel springy when walked on. Over time, vertical movement stresses the locking joints, leading to broken click edges, open gaps between planks, and squeaking sounds.

    Can I pick up floor patching materials and SPC flooring directly from your warehouse?

    Yes. We maintain a deep local inventory of rigid core SPC vinyl flooring at our Aiea facility. Your contractor can pick up complete flooring packages directly from our loading dock or arrange local jobsite delivery across Oahu. Explore our whole-home gallery to view finished flooring projects in local island residences.

    Upgrade Your Oahu Floors Today

    Ready to install quiet, flat, waterproof SPC vinyl flooring built to handle Hawaii conditions? Visit the product specialists at Maikaʻi Import to check real-time stock levels, inspect physical samples, and receive a detailed project estimate:

    • Visit Our Regional Showroom: Walk on full-size flooring displays, check cabinet finishes, and view quartz slabs at 98-019 Kamehameha Hwy #8, Aiea, HI 96701, located inside the Harbor Center business complex.
    • Call Our Sales Desk: Contact our sales team at (808) 488-5678 during regular business hours (Monday through Saturday, 8:00 AM to 5:00 PM) to confirm product availability and schedule material pickup.
    Get a Quote

  • RTA vs. Pre-Assembled Cabinets: What Your Finish Carpenter Needs to Know

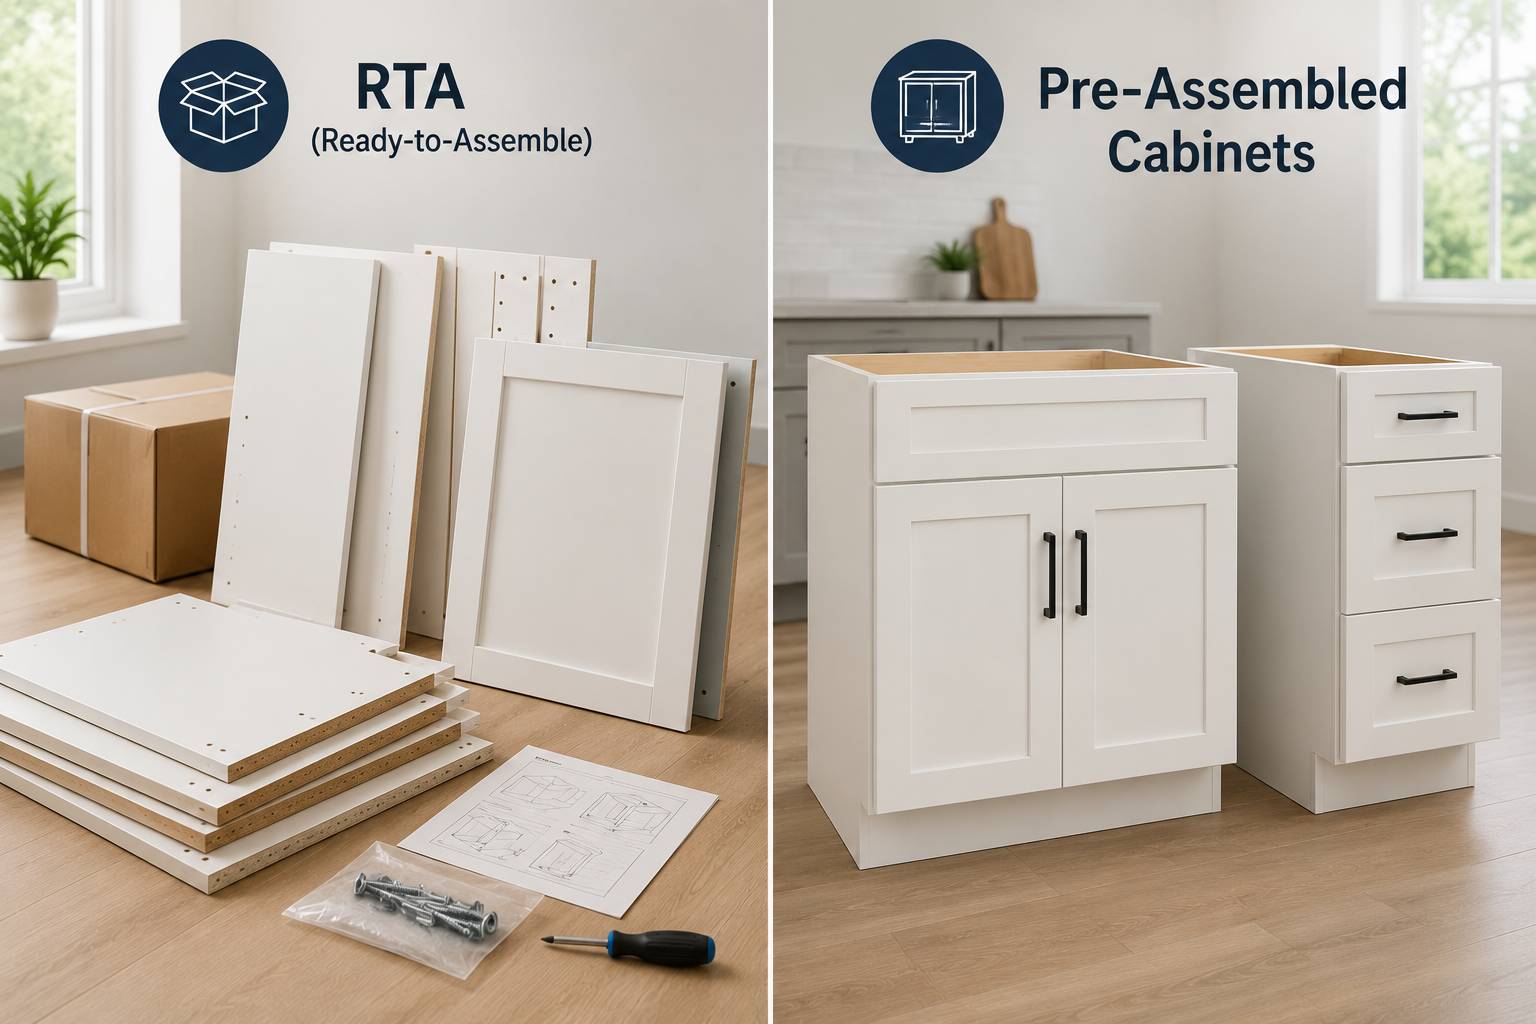
    When planning a kitchen or bathroom renovation on Oahu, choosing how your cabinetry arrives at the job site is just as important as picking door styles and finishes. Homeowners, general contractors, and finish carpenters face a fundamental choice: ordering flat-packed Ready-to-Assemble (RTA) cabinetry or opting for factory pre-assembled cabinet boxes.

    In Hawaii’s unique market, transpacific ocean freight and island delivery logistics significantly impact project costs. Shipping air-filled pre-assembled cabinet boxes from the mainland drives up container fees and increases the risk of freight damage during transit. Conversely, flat-packed RTA boxes optimize container space, lowering landed costs across the islands.

    Understanding how RTA and pre-assembled cabinets compare in assembly speed, structural strength, freight efficiency, and job site labor allows you to make informed decisions. Sourcing 100% all-plywood kitchen cabinets, paired with pre-polished quartz countertops and waterproof LVP flooring directly from our Aiea warehouse, provides your finish carpenter with high-quality materials built for efficient installation.

    Technical Comparison Matrix: RTA vs. Pre-Assembled Cabinets

    Before making a purchasing decision for your Oahu remodel, evaluate how RTA flat-pack cabinetry compares to factory pre-assembled units across key job site, financial, and logistical metrics:

    Performance Metric Flat-Packed RTA Cabinetry Factory Pre-Assembled Cabinetry
    Ocean Freight & Shipping Cost Up to 60% lower freight fees (compact volume) High shipping costs (paying to transport air inside boxes)
    Transit Damage Risk Low; dense flat-pack protection prevents crushed corners Higher risk of wracking, loose joints, or transit damage
    Job Site Navigation (Elevators/Stairs) Effortless; individual flat boxes fit tight high-rise spaces Difficult to maneuver through tight Oahu condo stairwells
    Job Site Assembly Labor Time Requires 10–15 minutes per box assembly time Zero box assembly required; ready to hang immediately
    Structural Joint Mechanics Interlocking cam-locks, wood glue, and pocket screws Factory staples, wood glue, and pocket screws
    Hawaii Storage Footprint Stacks neatly in garage or living room without crowding Occupies massive floor space before installation day

    The Freight Factor: Why Flat-Pack RTA Saves Hawaii Homeowners Money

    Shipping heavy goods to Hawaii involves ocean freight logistics. Freight forwarders calculate ocean container costs based on cubic volume (CBM) rather than raw weight alone.

    Factory pre-assembled cabinetry consists mostly of hollow air enclosed inside rigid boxes. Shipping a complete kitchen set of pre-assembled cabinets requires significant container volume, driving up freight surcharges that get passed on to the consumer.

    Flat-pack RTA cabinetry packs all plywood panels, face frames, hardware, and door fronts flat into dense, protective cardboard cartons. Up to three times as many RTA cabinet boxes fit into the same shipping footprint as pre-assembled units. This shipping efficiency reduces landed costs, allowing us to supply 100% all-plywood cabinetry at competitive wholesale pricing on Oahu.

    What Finish Carpenters Need to Know About Assembly & Installation

    Professional finish carpenters and licensed contractors prioritize structural integrity, precise square joints, and efficient job site installation. Some tradespeople initially express caution regarding RTA cabinetry due to past experiences with cheap, particleboard furniture imported from big-box retailers.

    However, professional-grade RTA cabinetry engineered for residential kitchen remodeling operates on a completely different structural level.

    1. Superior Joint Engineering and Fastening Options

    Our RTA modular cabinets feature precision-milled interlocking dovetail or metal cam-lock assembly systems paired with wood glue and face-frame pocket screws. Finish carpenters can assemble a standard base or wall box in 10 to 15 minutes. For maximum structural rigidity under heavy quartz decks, carpenters often add wood glue along the dado grooves and secure rear corner blocks with pneumatic brad nails.

    2. Built with Solid All-Plywood Boxes

    Unlike cheap flat-pack furniture built from soft particleboard that splits during assembly, our cabinetry features 1/2-inch and 3/4-inch cross-laminated all-plywood box construction paired with solid hardwood face frames. Screws bite deep into solid wood layers without stripping, ensuring hinges and drawer slides remain secure.

    3. Simplified Condo and Urban High-Rise Delivery

    For renovations in Honolulu, Kakaʻako, or Waikiki high-rises, maneuvering pre-assembled pantry cabinets or 36-inch base boxes into tight freight elevators and narrow hallways presents major logistical hurdles. Flat-packed RTA cartons fit easily on standard hand trucks and inside residential elevators, protecting common area drywall from accidental scuffs.

    Flexibility On-Site: Pre-Assembled or Flat-Pack from Our Aiea Warehouse

    Every project timeline on Oahu is unique. Some homeowners have the time and budget to let their finish carpenter assemble flat-pack RTA boxes on-site. Others work under strict AOAO work-hour windows or tight move-in deadlines that require pre-assembled boxes ready to hang immediately.

    At Maikaʻi Import, we accommodate both installation strategies:

    • Flat-Pack RTA Orders: Pick up flat-packed cartons directly from our Aiea loading dock for maximum freight savings and easy transit in standard pickup trucks or vans.
    • In-House Warehouse Assembly Services: Prefer pre-assembled units without spending trade labor hours on-site? Our warehouse assembly team can assemble, square, and quality-check your modular cabinet order in Aiea before job site delivery or pickup.

    You can pair your cabinet package with our pre-polished engineered quartz countertops, undermount sinks, non-porous shower panels, and waterproof LVP flooring for a complete, long-lasting home material package.

    RTA vs. Pre-Assembled Cabinet FAQs

    Do RTA cabinets take a long time for a contractor to assemble on-site?

    An experienced finish carpenter or installer typically assembles a standard flat-pack RTA cabinet box in 10 to 15 minutes using basic hand tools, wood glue, and a pneumatic staple gun. A standard 10′ x 10′ kitchen cabinet set can be fully assembled in a few hours.

    Are RTA cabinets structurally strong enough to support heavy 3cm quartz or granite tops?

    Yes. Because our RTA cabinets use 100% solid all-plywood box construction with solid wood face frames, their load-bearing capacity matches pre-assembled cabinetry. Once assembled and screwed together into a unified cabinet run, they easily support heavy engineered quartz slabs without sagging.

    What tools does a finish carpenter need to assemble RTA cabinets?

    Basic assembly requires a rubber mallet, a screwdriver or cordless drill with a star/Phillips bit, wood glue, and a quick-clamp. Many professional carpenters also use a narrow-crown pneumatic stapler to secure back panels and corner braces for added assembly speed.

    What happens if a box panel is damaged during flat-pack shipment?

    Because RTA cabinets are packaged in individual flat-pack boxes, replacing a single component (like a side panel or door front) is quick and straightforward. You can swap out individual parts directly from our local Aiea warehouse inventory without replacing the entire cabinet unit.

    Can I view assembled cabinet displays before deciding between RTA and pre-assembled options?

    Yes. Visiting our Aiea showroom allows you to inspect full-size assembled cabinet displays, check box joint construction, test European soft-close hinges, and consult with our team regarding flat-pack versus pre-assembled order options. View our whole-home gallery to see completed installations across Oahu.

    Order Professional-Grade Cabinetry Today

    Ready to supply your finish carpenter with durable, all-plywood cabinetry tailored for Hawaii homes? Visit the product specialists at Maikaʻi Import to check real-time stock levels, inspect physical samples, and receive a comprehensive project estimate:

    • Visit Our Regional Showroom: Inspect cabinet box construction, test soft-close drawer slides, and compare stone countertops at 98-019 Kamehameha Hwy #8, Aiea, HI 96701, located inside the Harbor Center business complex.
    • Request an Estimate: Call our front sales counter at (808) 488-5678 during regular operating hours (Monday through Saturday, 8:00 AM to 5:00 PM) to confirm product pricing and schedule material pickup.

    Get a Quote

  • The Modern Island Vanity: Upgrading Compact Bathrooms with Quartz Tops & Undermount Sinks

    Compact bathrooms, hall baths, and master ensuites across Oahu—from Honolulu high-rise condos to single-family homes in Mililani and Kailua—often struggle with limited square footage and high daily moisture. As one of the most frequently used spaces in any home, a cramped or outdated bathroom can slow down morning routines and drag down your property’s overall feel.

    The vanity station is the functional and visual center of any bathroom. Outdated drop-in sinks, stained cultured marble counters, and swollen particleboard vanity cabinets make small bathrooms feel dark and restrictive.

    Upgrading to a streamlined vanity system with a pre-polished quartz top and an undermount sink is one of the most impactful ways to modernize a compact bathroom. Sourcing all-plywood kitchen cabinets configured for vanity layouts, pre-cut quartz countertops, undermount sinks, and waterproof LVP flooring directly from our Aiea warehouse allows you to maximize storage, simplify cleaning, and create a spa-like atmosphere in any footprint.

    Comparing Vanity Tops: Quartz vs. Traditional Bathroom Surfaces

    Before selecting materials for your bathroom remodel, review how engineered quartz compares to traditional vanity top materials across key island performance metrics:

    Surface Material Stain & Chemical Resistance Moisture & Mold Resistance Annual Sealing Required Maintenance Level
    Engineered Quartz 100% Non-porous; resists cosmetics, soap, and hair dye Zero mold or mildew absorption $0 (Never requires sealing) Low; simple soap and water wipe-down
    Cultured Marble Scratches easily; vulnerable to acidic bath cleansers Gel coat cracks over time, trapping moisture N/A (Plastics break down) Moderate; prone to yellowing under tropical sun
    Natural Granite Porous; absorbs oils, liquid soaps, and toothpaste Requires constant sealing to prevent mildew $150–$300 annually High; requires routine chemical re-sealing
    Tile & Grout Tops Tile is durable, but grout lines stain rapidly Grout absorbs humidity, breeding black mold Requires frequent grout sealing Very High; constant scrubbing of grout lines

    3 Reasons Undermount Sinks & Quartz Tops Are Essential for Small Baths

    Upgrading a small bathroom requires design choices that eliminate clutter, expand usable surface space, and handle heavy moisture. Pairing a pre-polished quartz deck with a porcelain undermount sink solves three primary compact bathroom challenges:

    1. Maximizing Usable Counter Space

    In 30-inch or 36-inch vanity layouts, counter space is at a premium. Traditional top-mount or drop-in sinks feature raised lip rims that sit above the countertop, taking up several inches of valuable surface area. An undermount sink mounts directly beneath the quartz slab, creating a seamless, flat surface right up to the edge of the basin where you can comfortably set toiletries, soaps, and styling tools.

    2. Effortless Wipe-Clean Hygiene

    Drop-in sinks create a small grime-catching gap where the raised rim meets the countertop. In humid Hawaii bathrooms, water, toothpaste, and soap scum collect in this seam, creating an environment for black mold and mildew growth. Undermount sinks eliminate this lip entirely. Water and debris can be swept straight off the smooth quartz surface directly into the sink bowl with a damp cloth.

    3. Non-Porous Protection Against Bath Chemicals

    Bathroom vanities are subjected to hair dyes, nail polish removers, soaps, and facial cleansers. Natural stones like marble or granite absorb these chemical spills, resulting in permanent dark stains or etched spots. Engineered quartz is manufactured by binding natural quartz minerals with high-performance polymer resins under extreme pressure. This creates an impenetrable, non-porous surface that stands up to daily bath products without staining.

    Material Specifications: Engineered for Tropical Moisture

    Bathrooms experience higher humidity and temperature swings than almost any other room in the house. Choosing water-resistant vanity components prevents premature cabinet swelling, hardware rust, and subfloor damage.

    Vanity Component Material Specification Island Performance Advantage
    Vanity Box Construction 100% All-Plywood Framing Resists warping, delamination, and humidity damage from hot showers
    Countertop Slab Pre-Polished Engineered Quartz Non-porous stain defense with pre-finished eased edges for fast installation
    Sink Basin Vitreous China Porcelain Undermount Non-staining, scratch-resistant surface with built-in overflow protection
    Hardware Components European Soft-Close Hinges & Slides Concealed nickel-plated hardware smooths operation and protects against salt air

    All-Plywood Vanity Construction

    Many big-box store vanities use compressed particleboard or medium-density fiberboard (MDF) for cabinet sides and drawer boxes. In a humid bathroom, steam from hot showers causes particleboard to absorb moisture, leading to swelling, peeling vinyl, and structural failure. Our cabinetry line uses solid all-plywood box construction that holds its shape and structural integrity for decades in Hawaii’s climate.

    Cohesive Wet-Room Styling

    You can extend this modern, low-maintenance design throughout your bathroom by pairing your new vanity with non-porous shower panels. Replacing traditional tiled shower walls with continuous stone-look panels eliminates grout lines completely, giving you a cohesive, spa-like environment that wipes clean in seconds. Finishing the space with 100% waterproof rigid core LVP flooring protects your subfloor from bath splashes.

    Modern Island Vanity FAQs

    What is the standard height for a modern bathroom vanity?

    Traditional vanities were built at a height of 30 to 32 inches. Modern “comfort height” vanities stand at 36 inches (matching standard kitchen cabinet heights). Comfort height vanities reduce the need to bend over while washing your hands or brushing your teeth, making them a popular choice for adult bathrooms and master suites.

    Can kitchen cabinets be configured to work as bathroom vanities?

    Yes. Kitchen base cabinets can be adapted for bathroom vanity installations, provided the plumbing layout is accounted for. Using 24-inch deep base boxes with modified drawer or sink-base configurations offers deeper storage than shallow 21-inch vanities, which is ideal for spacious master bathrooms.

    How do I select the right quartz slab size for a small vanity?

    We stock pre-polished quartz slabs in standard architectural sizes: 110″ x 26″ runs that your contractor can easily trim down to fit standard vanity widths (such as 30″, 36″, 48″, or 60″). Pre-finished eased front edges eliminate time-consuming edge profiling work on-site, saving you time and labor costs.

    Are undermount sinks secure enough to hold heavy water loads?

    Yes. Undermount porcelain sinks are mounted directly to the underside of the quartz countertop using high-strength epoxy, specialized undermount clips, and a continuous bead of 100% waterproof silicone sealant. When installed correctly, they securely support a full basin of water without sagging or leaking.

    Can I inspect quartz tops and vanity cabinet finishes in person before ordering?

    Yes. Visiting our Aiea showroom allows you to view full-size quartz slabs under natural lighting, test our soft-close cabinet drawers, and match sink basins and flooring options side-by-side. Explore our whole-home gallery to see finished bathroom installations in homes across Oahu.

    Upgrade Your Bathroom Vanity Today

    Ready to transform your compact bathroom with a durable, low-maintenance quartz vanity and undermount sink package? Visit the product specialists at Maikaʻi Import to check real-time stock levels, gather spec sheets, and receive an estimate:

    • Visit Our Regional Showroom: Inspect full-size quartz slabs, test hardware mechanisms, and select flooring options at 98-019 Kamehameha Hwy #8, Aiea, HI 96701, located inside the Harbor Center business complex.
    • Request an Estimate: Call our sales desk at (808) 488-5678 during regular business hours (Monday through Saturday, 8:00 AM to 5:00 PM) to confirm product pricing and schedule material pickup.

    Get a Quote

  • Ewa Beach & Kapolei Homes: Open-Concept Flooring Transitions That Work

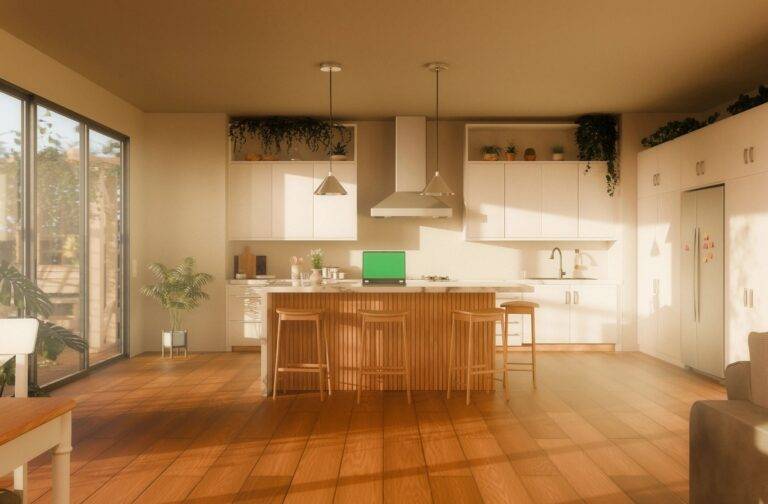
    Master-planned communities and modern single-family subdivisions across Ewa Beach, Kapolei, and Makakilo are built around open-concept living. Designed for modern family lifestyles, these floor plans bring the kitchen, dining room, and main living area together under one continuous footprint.

    While open layouts maximize natural light and foster effortless entertaining, managing the physical transitions between functional zones presents a common interior design challenge. Chopping up an open-concept main floor with different surface materials—like installing ceramic tile in the kitchen, hardwood in the dining room, and carpet in the living area—creates visual clutter, makes rooms feel smaller, and introduces dangerous trip hazards.

    To create a clean, modern aesthetic that handles West Oahu’s warm climate, selecting a continuous flooring surface is essential. Sourcing 100% waterproof rigid core LVP flooring, paired with modular kitchen cabinets and pre-polished quartz countertops directly from our Aiea warehouse, allows you to execute seamless transitions that elevate your entire home.

    The Open-Concept Challenge: Visual Flow vs. Zone Durability

    Before selecting materials for an open-concept main floor, evaluate how traditional segmented flooring compares to unified rigid core SPC vinyl across key functional criteria:

    Design Element Traditional Segmented Flooring (Tile + Carpet + Wood) Continuous Rigid Core SPC Vinyl Flooring
    Visual Room Perception Visually chops up space; makes open layouts feel smaller Creates an unbroken flow that expands visual floor area
    Transition Points Metal T-moldings and raised thresholds trap dirt and trip toes Zero transition strips required across large continuous runs
    Maintenance Consistency Requires three different cleaning tools and chemical solutions Single maintenance routine; sweep and damp mop across all zones
    Moisture & Sand Defense Carpet absorbs sand and spills; wood warps near kitchen sinks 100% waterproof limestone core handles kitchen and entry messes
    Installation Speed Complex multi-trade installation with long tile-curing waits Fast click-lock floating installation straight through main zones

    Why Continuous SPC Vinyl Works Best for West Oahu Living

    Ewa Beach and Kapolei experience some of the warmest temperatures and highest sun exposure on Oahu. Homes in these regions require flooring materials that stay dimensionally stable under intense thermal expansion while handling active family foot traffic, beach sand, and tracked-in dirt.

    1. Eliminating Visual Disruption

    Using a single material throughout the entry, hallway, kitchen, and living areas draws the eye across the entire depth of your home. Light oak, natural teak, or warm cashew wood-grain planks reflect incoming trade-wind sunlight, instantly making a standard 1,500-square-foot Ewa Beach home feel like an expansive executive estate.

    2. Removing Trip Hazards and Transition Strips

    Traditional floor changes rely on raised metal transition strips or bulky wood T-moldings. These raised thresholds collect red dirt, catch vacuum cleaner wheels, and create trip hazards for toddlers and elderly family members. Our rigid core SPC planks utilize a precision click-lock system that lays flat, allowing you to run up to 4,000 square feet of continuous flooring without needing expansion transition strips in doorways.

    3. Unmatched Durability for Heavy Traffic Zones

    In open layouts, high-traffic pathways run straight from the front entry door, past the kitchen island, and out to the covered back lanai. Our Standard 7 Series (6.5mm) and Premium 9 Series (7mm) SPC planks feature a commercial-grade 20mil wear layer. This heavy-duty clear shield resists scratches from active pets, dragging furniture, and coarse beach sand carried home from Ko Olina or White Plains Beach.

    4 Strategic Ways to Define Zones Without Wall Partitions

    While running a continuous floor surface opens up your home, you may still want to subtly define individual living zones without building physical walls or adding metal floor strips. You can achieve balance using smart design cues:

    1. Align Planks Parallel to Main Architectural Lines

    Install your vinyl planks parallel to the longest exterior wall or primary sightline from your front entryway. Running planks length-wise draws the eye naturally through the home, guiding foot traffic toward the patio or backyard lanais common in Kapolei subdivisions.

    2. Leverage Kitchen Island Color Contrast

    In an open-concept kitchen, let your cabinetry provide the visual anchor. Contrast light-colored continuous SPC flooring by pairing it with dark navy blue, charcoal gray, or textured woodgrain base cabinets on your kitchen island. The contrast anchors the cooking area while the floor flows uninterrupted beneath it.

    3. Frame Living Zones with Low-Profile Area Rugs

    If you want to create a cozy media corner in your living area, place a soft, low-profile area rug over your continuous vinyl floor. Rugs define seating zones without disrupting the permanent waterproof floor beneath.

    4. Create Cohesive Bathroom & Utility Transitions

    Extend your open-concept design into master bathrooms and laundry rooms by pairing your continuous SPC flooring with non-porous shower panels. Eliminating tile grout lines in wet rooms keeps your maintenance routine uniform across the entire floor plan.

    Material Specifications: Engineered for Island Homes

    When selecting flooring for an open-concept remodel in Kapolei or Ewa Beach, core material composition determines long-term performance:

    Flooring Component Technical Specification Ewa Beach Homeowner Benefit
    Core Composition Stone-Polymer Composite (Limestone + Virgin PVC) Zero warping, swelling, or cupping under high ambient heat and humidity
    Wear Layer Shield 20mil (0.50mm) Commercial Clear Coat Superior scratch defense against pet claws, high heels, and beach sand
    Acoustic Padding Pre-Attached High-Density IXPE Underlayment Absorbs footfall impact noise and softens feel underfoot without extra rolls
    Surface Finish UV-Cured Ceramic Bead Coating Resists sun fading near large glass slider doors and open lanais

    Pairing your continuous floors with pre-polished quartz countertops and solid plywood cabinets creates a complete, low-maintenance home interior. We stock quartz slabs in standard architectural sizes: 110″ x 26″ for main counter runs, 110″ x 36″ for breakfast bars, and 110″ x 42″ for central kitchen islands. Pre-finished eased edges eliminate time-consuming edge-profiling work on-site, allowing your contractor to cut drop-in openings for undermount sinks quickly.

    Open-Concept Flooring FAQs

    Can I run SPC vinyl flooring continuously from my kitchen into the laundry room and bathroom?

    Yes. Because rigid core SPC flooring is 100% waterproof and constructed with zero wood fibers, it will not swell, buckle, or delaminate when exposed to water splashes in laundry rooms, powder rooms, or master bathrooms.

    How do I clean continuous LVP flooring in a home with kids and pets?

    Routine maintenance is straightforward. Sweep or vacuum daily using a soft brush attachment to remove loose beach sand and dust. For deeper cleaning, use a damp microfiber mop paired with a pH-neutral floor cleaner. Avoid harsh steam mops, which can force moisture into subfloor joints over time.

    Does continuous SPC vinyl flooring require an acclimation period before installation?

    While SPC flooring is far more dimensionally stable than traditional hardwood or laminate, we recommend letting the unopened boxes rest inside your air-conditioned home for 24 to 48 hours prior to installation. This allows the material to adjust to your home’s ambient indoor temperature.

    Can SPC flooring be installed directly over existing subfloors or tile in Kapolei homes?

    Yes. Rigid core SPC vinyl features a dense stone-composite core that bridges minor subfloor imperfections. It can be installed over clean concrete slabs, existing sheet vinyl, or flat ceramic tile without telegraphing grout lines through the plank surface, saving you time and demolition costs.

    Can I inspect full-size flooring planks before purchasing?

    Yes. Visiting our Aiea showroom allows you to lay full-size flooring planks side-by-side under natural light, feel the embossed wood textures, and match flooring swatches directly against our cabinet and quartz collections. Explore our whole-home gallery to view finished open-concept installations across Oahu.

    Upgrade Your Open-Concept Home Today

    Ready to transform your Ewa Beach or Kapolei home with seamless, high-performance continuous flooring? Visit the product specialists at Maikaʻi Import to check real-time stock levels, inspect physical samples, and receive a line-item estimate:

    • Visit Our Regional Showroom: Walk on full-size flooring displays, examine cabinet construction, and view quartz slabs at 98-019 Kamehameha Hwy #8, Aiea, HI 96701, located inside the Harbor Center business complex.
    • Request an Estimate: Call our front sales desk at (808) 488-5678 during regular operating hours (Monday through Saturday, 8:00 AM to 5:00 PM) to confirm product availability and schedule material pickup.
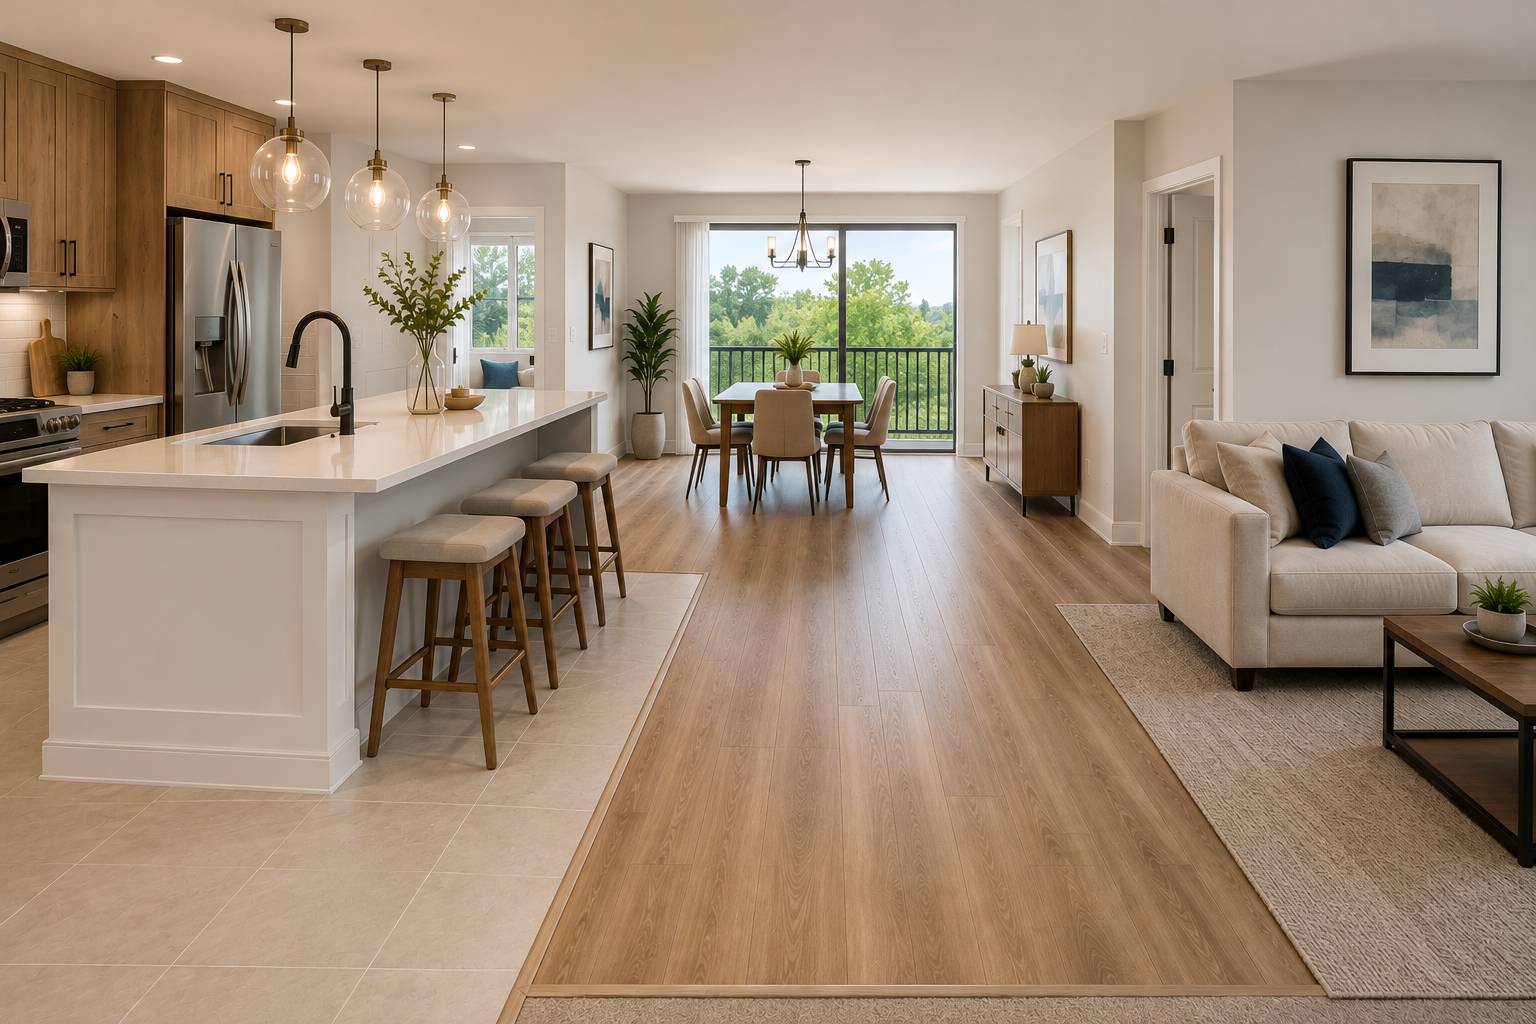
    Get a Quote